Mold on your bathroom ceiling isn’t just unsightly; it can also pose serious health risks and contribute to musty odors in your home. Understanding the types of mold, their health implications, and effective removal strategies is crucial for maintaining a clean and safe bathroom environment. This article will provide you with proven strategies on how to remove mold from bathroom ceiling and prevent it from returning, ensuring your space remains mold-free and fresh.
Contents
- 1 Understanding Mold: Types and Health Risks
- 2 Preventative Measures to Keep Mold at Bay
- 3 DIY Mold Removal Techniques
- 4 Eliminating Musty Odors from Your Home
- 5 Maintaining a Mold-Free Bathroom
- 6 Conclusion
- 7 Frequently Asked Questions
- 7.1 What are the health risks associated with mold exposure?
- 7.2 What are some effective natural remedies for removing mold?
- 7.3 How can I prevent mold from growing in my bathroom?
- 7.4 Is bleach a safe option for mold removal?
- 7.5 How can I get rid of musty odors in my home?
- 7.6 When should I consider professional mold remediation?
Key Takeaways
- Professional mold remediation is recommended for severe infestations, especially with black mold, to avoid health risks.
- Moisture control, improved air circulation, and regular cleaning are key preventative measures against mold growth.
- DIY mold removal can be effective using natural remedies like vinegar or chemical solutions such as bleach or chlorine dioxide.
- Musty odors can be eliminated by addressing moisture issues, using odor absorbers, and ensuring thorough mold removal.
- Maintaining a mold-free bathroom involves routine inspections, using effective cleaning agents, and repairing any water entry points.
Understanding Mold: Types and Health Risks
Identifying Different Mold Varieties
Mold comes in various forms, each with its unique characteristics and potential risks. Identifying the type of mold is crucial for effective removal. Mildew, often confused with mold, is flat, powdery, and easier to remove. In contrast, mold has a raised and slimy or fuzzy texture, with colors ranging from green to black.
- Mildew: Light, powdery, surface-level
- Mold: Dark, lumpy, invasive
Mold’s ability to penetrate surfaces like drywall makes it particularly troublesome. If not completely eradicated, it can persist and cause damage repeatedly. For small areas affected by non-black molds, DIY methods may suffice. However, for pervasive or black mold infestations, professional remediation is advised to ensure safety and prevent recurrence.
Breathing in mold spores can lead to health issues, ranging from mild irritation to serious systemic problems. It’s essential to address mold promptly and thoroughly to protect your health and home.
Health Implications of Mold Exposure
Exposure to mold can lead to a variety of health issues. Inhaling mold spores often results in respiratory discomfort, such as coughing and sneezing, and can escalate to more severe symptoms including dizziness and headaches. Mold-related illnesses are particularly concerning due to their potential to cause chronic conditions like fatigue, nausea, and joint pain.
Mold spores, when disturbed, can easily become airborne and pose a risk to health. This underscores the importance of wearing protective gear during removal efforts.
Black mold, a notorious variety, is associated with significant health risks. It can affect the hormonal, immune, and nervous systems, potentially leading to depression and memory loss. For areas of infestation smaller than 10 square feet, the use of an N-95 respirator, gloves, and goggles is advised. Larger areas require professional remediation to ensure safety.
Symptoms of mold exposure can range from mild irritations to life-threatening conditions. It’s crucial to address mold promptly to prevent long-term health complications.
Professional Remediation for Severe Infestations
When mold infestations become severe, professional remediation is the safest and most effective option. Professionals have access to industrial-strength equipment and advanced cleaning solutions that are not available to the general public. They are trained to meticulously clean every surface, ensuring that mold spores are eradicated from your home.
Professional remediation teams follow strict safety protocols to protect your health and prevent cross-contamination.
For severe cases, the cost of professional services is a worthwhile investment for the peace of mind and long-term health benefits it provides. Here are the steps typically involved in professional mold remediation:
- Inspection and assessment of the mold situation.
- Containment of the affected area to prevent the spread of mold spores.
- Air filtration to capture microscopic mold spores from the air.
- Removal and disposal of mold-infested materials.
- Cleaning and disinfecting of remaining surfaces.
- Restoration of the affected area to its original condition.
Preventative Measures to Keep Mold at Bay
Moisture Control Strategies
Controlling moisture is the cornerstone of mold prevention. Invest in a shower squeegee and make it a habit to wipe down walls and shower doors after each use. This simple action can significantly reduce the moisture that mold thrives on.
Dehumidifiers play a crucial role in maintaining low humidity levels, especially in naturally damp areas like bathrooms. Consider running a dehumidifier regularly to keep the air dry and inhospitable to mold.
Regular maintenance of your bathroom’s ventilation system is essential. Ensure that fans are clean and functioning properly to expel moist air efficiently.
Here are additional steps to keep moisture at bay:
- Use grout to waterproof areas prone to water exposure.
- Promptly repair any leaks to prevent water accumulation.
- Insulate walls to reduce condensation.
By implementing these strategies, you can create an environment that discourages mold growth and protects your health.
Improving Air Circulation and Light Exposure
Enhancing air circulation and light exposure in your bathroom is a key step in preventing mold growth. Ensure adequate ventilation by using exhaust fans or opening windows, especially after hot showers. This helps to reduce humidity levels, a primary factor in mold development.
Sunlight is a natural mold deterrent. Allow as much natural light as possible to enter the bathroom. If privacy allows, keep blinds or curtains open during the day. For bathrooms with limited or no windows, consider installing energy-efficient lighting that mimics natural light.
- Install exhaust fans or upgrade existing ones for better performance
- Keep windows open when weather permits
- Use dehumidifiers to maintain optimal humidity levels
Regularly check and clean ventilation systems to prevent dust buildup, ensuring they function effectively.
Remember, consistent airflow and light are your allies in the fight against mold. By incorporating these strategies, you can create an environment that is less hospitable to mold spores and more comfortable for you.
Regular Cleaning and Maintenance Routines
Maintaining a mold-free bathroom requires consistent effort. Develop a regular cleaning schedule to prevent mold from taking hold. Daily tasks should include wiping down surfaces and managing moisture by using a squeegee after showers. Weekly, focus on more thorough cleanings, such as scrubbing tiles and grout.
Decluttering is also crucial. Keep surfaces clear to allow for effective cleaning and drying. Bi-weekly to monthly, deep clean areas prone to mold growth. This includes washing shower curtains and cleaning out any standing water in soap dishes or bottles.
Remember, prevention is key. Regular maintenance not only keeps mold at bay but also prolongs the life of your bathroom fixtures.
Here’s a simple checklist to help you stay on track:
- Daily: Wipe down surfaces; manage moisture.
- Weekly: Scrub tiles and grout; check for leaks.
- Monthly: Deep clean; wash shower curtains.
- Seasonally: Inspect and seal grout lines; declutter and organize.
DIY Mold Removal Techniques
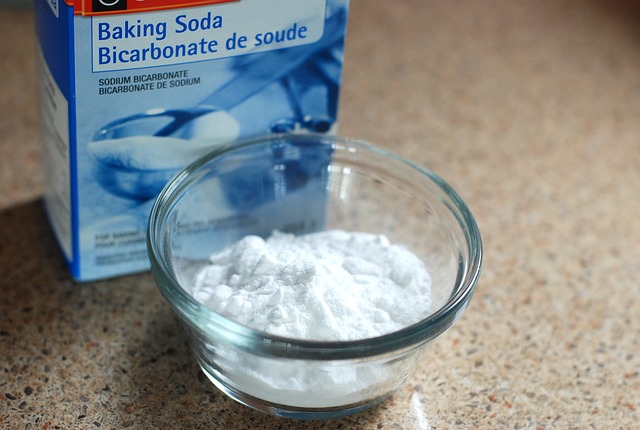
Natural Remedies: Vinegar and Baking Soda
Harness the cleansing power of natural ingredients to tackle mold. Mix a simple solution of vinegar and water, applying it to the affected area. After letting it sit, scrub away the mold with ease. For tougher spots, a paste of baking soda and water can be applied directly.
Baking soda not only cleans but also deodorizes, leaving your bathroom fresh.
Follow these steps for a natural mold removal process:
- Prepare a 1:1 mixture of distilled white vinegar and water in a spray bottle.
- Generously spray the moldy surface and wait for 20 minutes.
- Wipe the area with a damp cloth or sponge.
- For persistent mold, apply a baking soda paste and scrub gently.
- Rinse with clean water and dry the surface thoroughly.
Chemical Solutions: The Safe Use of Bleach
While bleach is a potent mold killer, its use requires caution. Always dilute bleach properly before application; a standard ratio is one cup of bleach to one gallon of warm water. Apply the solution with a toothbrush for precise scrubbing, and rinse with a wet sponge after cleaning.
Italics are essential when discussing safety. Wear rubber gloves and ensure the area is well-ventilated to prevent inhalation of fumes. Bleach should not be mixed with other cleaners, especially ammonia, as it can create toxic gases.
Remember to clean visible mildew first to limit spore spread.
For areas where bleach is not suitable or for those seeking a less aggressive approach, consider alternatives like white vinegar or chlorine dioxide. These options can be equally effective without the harshness of bleach.
Here’s a quick guide to bleach use:
- Dilute with water (1 cup bleach to 1 gallon water)
- Apply with a toothbrush
- Rinse thoroughly
- Ventilate the area
- Wear protective gloves
Understanding product compatibility, dilution ratios, and surface suitability is crucial for safe and effective mold removal.
Innovative Solutions: Chlorine Dioxide Products
Chlorine dioxide (ClO2) is a game-changer in the realm of mold and odor elimination. Once released, ClO2 acts as a strong oxidizing agent, reacting with oxygen to neutralize odors at the molecular level. Unlike traditional methods, ClO2 degrades into a harmless saline solution, ensuring safety and effectiveness.
ClO2 technology has revolutionized the way we approach odor control, offering a powerful solution that begins working immediately upon release.
For optimal results, follow these simple steps:
- Clean any visible mildew to prevent spore spread.
- Use ClO2 products according to the manufacturer’s instructions.
- Allow the gas to permeate the area for thorough odor neutralization.
- Ventilate the space after treatment to clear any residual gas.
Previously confined to industrial use, innovative products like Auto Shocker ClO2 Odor Eliminator now make this technology accessible for home use. Embrace the power of ClO2 and enjoy a mold-free, odorless bathroom environment.
Eliminating Musty Odors from Your Home

Addressing the Source: Moisture and Mold Removal
Eliminating musty odors begins with addressing the source of the problem: moisture and mold. Moisture control is crucial in preventing mold growth and the accompanying smells. Start by inspecting your home for any signs of excess moisture, particularly in areas prone to dampness such as the attic, basement, and closets. Look for and repair any water entry points, including cracks, holes, or damaged shingles.
- Bleach
- White vinegar
- Moisture removal
- Increasing light and air
Once you’ve identified and fixed the sources of moisture, it’s time to remove the existing mold. Use bleach or white vinegar to clean affected surfaces, and ensure that bathroom surfaces are completely dry after use. Additionally, increasing light and air exposure can help kill lingering mildew and prevent future growth.
For persistent musty odors, consider professional mold remediation, especially if the affected area is large or if you’re dealing with toxic black mold. Remember, removing moisture-filled items and using dehumidifiers can significantly reduce humidity levels, further aiding in mold and odor elimination.
Odor Absorbers: Charcoal and Lemon Peels
Activated charcoal is renowned for its ability to absorb odors effectively. It’s particularly useful in small, confined spaces where musty smells tend to linger. For a simple DIY solution, place a bowl of activated charcoal in the affected area and let it work its magic.
Lemon peels, on the other hand, are natural deodorizers that leave a fresh, citrus scent. Boil the peels to release the lemony essence, then transfer the liquid into a spray bottle for easy application. Spraying this mixture around your bathroom can help neutralize unpleasant odors.
Remember, while these odor absorbers can provide temporary relief, they do not address the underlying issue. It’s crucial to eliminate the source of mold and moisture to prevent the return of musty smells.
Here’s a quick guide on using these natural odor absorbers:
- Activated Charcoal: Place in a bowl or container in the problem area.
- Lemon Peel Spray: Boil peels, cool, and fill into spray bottles for use.
Both methods are effective, but for lasting results, ensure that all mold is removed and any leaks are repaired to prevent future odor issues.
Long-Term Solutions for Musty Smells
To ensure a musty-free environment, addressing the root cause is crucial. Moisture is the enemy of a fresh-smelling home, and without proper attention, the battle against musty odors is never truly won.
Regular inspections and maintenance are your best defense. Fix leaks promptly, replace damaged drywall, and ensure thorough mold removal. These steps prevent the recurrence of unpleasant odors.
For a lasting fresh scent, consider the following:
- Use dehumidifiers to maintain low humidity levels.
- Ensure good air circulation with fans and open windows.
- Employ natural deodorizers like lemon peels or activated charcoal.
Remember, a musty smell is a sign of lingering moisture or mold. Tackle these issues head-on for a permanently pleasant atmosphere in your home.
Maintaining a Mold-Free Bathroom

Effective Cleaning Agents and Techniques
To maintain a mold-free bathroom, selecting the right cleaning agents is crucial. Compatibility, dilution ratios, surface suitability, and safety measures are key to achieving effective and eco-friendly cleaning results. Here’s a quick guide to the essentials:
- Disinfectant Cleaner: Sanitizes various surfaces.
- Glass Cleaner: For streak-free mirrors and glass.
- Bathroom Cleaner: Formulated for tiles, tubs, and showers.
- Toilet Cleaner: Cleans and disinfects toilets.
- Baking Soda and Vinegar: Natural alternatives for scrubbing and deodorizing.
For tackling tough grime and mold, a mix of one part bleach to two parts water can be applied to mold spots, left to sit, then scrubbed and rinsed. Ensure proper ventilation when using bleach to safeguard against fumes.
When selecting a cleaning method, consider whether steam cleaning, mopping, or scrubbing best suits your needs. Evaluate the ease of cleaning and maintenance after use to ensure a hassle-free experience.
Remember, regular use of the right cleaning agents and techniques can prevent mold from taking hold, keeping your bathroom fresh and hygienic.
Sealing and Repairing Potential Water Entry Points
Ensuring your bathroom remains mold-free involves diligent maintenance of potential water entry points. Regular inspections can identify areas that need attention, such as cracked tiles or deteriorating grout.
Sealing these vulnerabilities is crucial. Use a high-quality silicone caulk to seal gaps around the bathtub, sink, and toilet base. For larger repairs, consider a waterproof sealant or grout for tiles.
Remember, prevention is key. Addressing these issues promptly can save costly repairs in the future.
Here’s a list of common areas to check for potential water entry:
- Shower and bathtub edges
- Sink and countertop junctions
- Toilet base
- Window seals near the shower
- Exhaust fan fixtures
By taking proactive steps to seal and repair these areas, you can significantly reduce the risk of mold growth due to moisture intrusion. It’s a simple yet effective strategy in maintaining a healthy bathroom environment.
Routine Inspections and Professional Assessments
Regular inspections are crucial in maintaining a mold-free bathroom. Professional assessments can pinpoint potential problem areas that may not be visible to the untrained eye. These evaluations should be conducted at least annually to ensure that all preventative measures are effective.
Professional cleaners offer specialized services tailored to your needs. They can provide deep cleaning that targets mold and mildew, especially in hard-to-reach areas. It’s important to research and select a reputable service, as their expertise can be invaluable in keeping your bathroom pristine.
Consistent monitoring and maintenance are the cornerstones of a mold-free environment. Routine checks help in early detection and prevention of mold growth.
Remember to update your cleaning schedule seasonally. Summer repairs and checks are essential, especially in hot and humid areas where mold thrives. Inspect for leaks, clean exhaust vents, and ensure that all areas are dry and well-ventilated.
Conclusion
In conclusion, banishing mold from your bathroom ceiling and other areas of your home requires a multifaceted approach. From professional mold remediation for severe cases to DIY strategies for smaller infestations, the key is to address the root causes of moisture and ensure thorough cleaning and prevention. Utilizing a combination of bleach, white vinegar, moisture removal techniques, and increasing light and air circulation can make a significant difference. Remember to protect yourself with appropriate gear when dealing with toxic molds and consider innovative solutions like chlorine dioxide for persistent musty odors. By following these proven strategies, you can create a healthier living environment and say goodbye to mold problems forever.
Frequently Asked Questions
What are the health risks associated with mold exposure?
Exposure to mold can lead to a variety of health issues, especially for individuals with allergies or compromised immune systems. Health risks include respiratory problems, allergic reactions, and in severe cases, exposure to toxic molds like black mold can cause neurological symptoms and other serious conditions.
What are some effective natural remedies for removing mold?
Natural remedies for mold removal include using white vinegar or a baking soda paste. Vinegar can upset the pH balance of mold, killing it and deodorizing the area. Baking soda can be applied as a paste, allowed to sit, then scrubbed and rinsed off.
How can I prevent mold from growing in my bathroom?
To prevent mold growth, control moisture levels by using dehumidifiers and exhaust fans, improve air circulation and light exposure, and maintain regular cleaning routines. Also, ensure that bathroom surfaces are completely dry after use.
Is bleach a safe option for mold removal?
Bleach can be effective for killing mold on non-porous surfaces. A solution of one part bleach to two parts water can be used, but it’s important to wear gloves and ensure good ventilation. For larger areas or black mold, professional remediation is recommended.
How can I get rid of musty odors in my home?
Musty odors can be addressed by removing moisture sources, cleaning existing mold, and using odor absorbers like charcoal and lemon peels. Increasing light and air can also help. For persistent odors, chlorine dioxide products may offer a long-term solution.
When should I consider professional mold remediation?
Professional remediation should be considered if the mold covers a large area (more than 10 square feet), if you’re dealing with toxic black mold, or if you have health concerns that make DIY removal risky. Professionals have the equipment and expertise to safely remove mold.