
How to build a kitchen island? Embarking on a journey to create your custom is a rewarding DIY project that not only enhances the functionality of your kitchen but also allows for a personalized touch that reflects your style and needs. This article will guide you through the process, from designing your dream island to the final touches of installation and care. Draw inspiration from expert craftspeople and a vast array of options to ensure your kitchen island is a perfect fit for your home.
Contents
- 1 Key Takeaways
- 2 Designing Your Dream Kitchen Island
- 3 The Construction Process
- 4 Customization and Personalization
- 5 Installation and Setup
- 6 Maintenance and Care
- 7 Conclusion
- 8 Frequently Asked Questions
- 8.1 How do I determine the perfect size for my kitchen island?
- 8.2 Can I customize the color and materials for my kitchen island?
- 8.3 What functional features can I incorporate into my kitchen island?
- 8.4 How is the kitchen island secured to the floor during installation?
- 8.5 How should I maintain and care for my wooden kitchen island?
- 8.6 Is it possible to get assistance or inspiration before making a purchase?
Key Takeaways
- Designing a kitchen island involves choosing the right size, shape, materials, and incorporating functional features such as overhang for seating or tilt-out trash units.
- The construction process is straightforward with the right tools and materials, and includes a step-by-step approach to assembly and finishing.
- Personalization is key, with options for drawers, shelving, paint colors, and countertops like the durable teak butcher block.
- Installation should ensure the island is secure, well-aligned with existing cabinetry, and stable for safety and longevity.
- Maintenance is crucial for the longevity of the kitchen island, including protecting wood surfaces and routine cleaning, with occasional refinishing or repainting as needed.
Designing Your Dream Kitchen Island

Determining the Perfect Size and Shape
When envisioning your custom kitchen island, size and shape are paramount. Consider the available space and how you’ll move around the island. A common guideline is to allow for at least 42 inches of walkway space around the island. For seating, aim for 22 to 24 inches of space per seat to maintain comfort.
Space per seat at an island: Ideally, every person should have about 22 to 24 inches of seating space to avoid bumping knees and elbows.
Remember, the island’s size impacts its functionality. A smaller island might limit storage options, while a larger one can accommodate more features but may require more materials and time to build. Balance your desires with practicality.
The key to a successful kitchen island is not just its aesthetic appeal, but its suitability to your daily routine and interaction within the space.
Here’s a quick checklist to finalize your island’s dimensions:
- Measure your kitchen’s dimensions.
- Determine the island’s primary functions.
- Decide on the number of seats, if applicable.
- Factor in appliances or sinks to be integrated.
- Leave adequate clearance for doors and walkways.
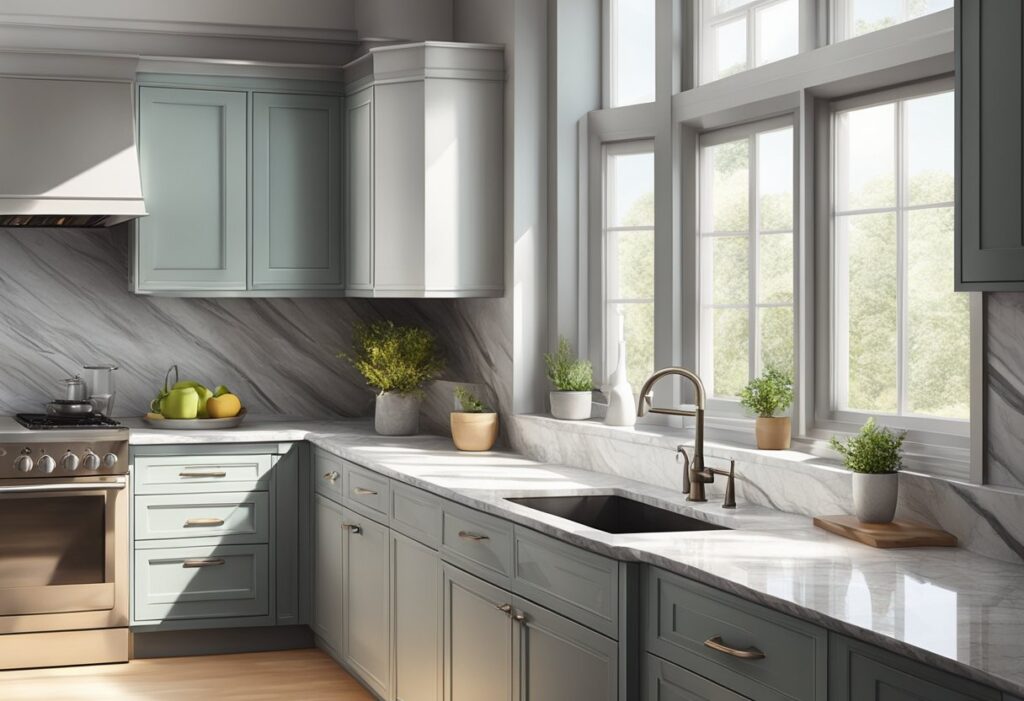
Selecting Materials and Color Schemes
Choose a color palette that reflects your style. Traditional or modern? Match the cabinetry or make a statement with a contrasting island.
Materials Matter
- Wood/MDF for a classic look
- Thermofoil/MDF for durability
- Consider the finish: matte, satin, or high gloss
Partner with a reputable paint supplier. Benjamin Moore offers a range of colors, including custom options. Remember, the right paint can transform your kitchen island.
The standard depth for a kitchen island without seating is 25 inches. For seating, aim for a depth of 36 inches to ensure comfort and functionality.
When selecting materials, also think about the long-term maintenance and the look you want to achieve. Your choices will affect the island’s durability and the ease of care.
Incorporating Functional Features
When building a custom kitchen island, functionality should be at the forefront of design. Consider the daily use and the tasks that the island will facilitate. A well-thought-out island can significantly enhance your kitchen’s efficiency.
- Storage Solutions:
- Drawers for utensils
- Cabinets for pots and pans
- Open shelves for quick access items
Incorporate features that cater to your cooking style. For instance, a built-in cutting board can be both a time-saver and a space-efficient solution. Think about integrating a trash bin or recycling unit to streamline waste management.
Ensure that the island’s height is ergonomic, allowing for comfortable use without strain.
Remember, the island is not just a work area but also a social hub. Include seating options or an overhang for bar stools to create an inviting atmosphere. By personalizing these features, your kitchen island will not only be a statement piece but also a testament to your DIY skills.
The Construction Process

Gathering Your Tools and Materials
Before diving into the construction of your custom kitchen island, it’s crucial to have all the necessary tools and materials at hand. Preparation is everything when it comes to DIY projects. Start by assembling a basic toolkit, which should include a Circular Saw, Jig Saw, Power Drill / Driver, Drill Bits, Clamps, Table Saw, Measuring Tapes, and Carpentry Squares.
When selecting lumber, opt for quality and durability. Cedar is a popular choice due to its resistance to moisture and decay. Here’s a quick list of the types of cedar you might need:
- 2″ x 4″ x 8 ft Cedar
- 1″ x 6″ x 8 ft Cedar
- 1″ x 2″ x 8 ft Cedar
- 1″ x 4″ x 8 ft Cedar
- 1″ x 8″ x 8 ft Cedar
Don’t forget the importance of good quality paint brushes and rollers if you plan to add color to your island. The right tools can make a significant difference in the finish of your project. Remember, the advantages and disadvantages of each material and tool should be considered to match your needs, budget, and style.
A persistent will to do it right and a generous amount of passion are the intangible materials that will bring your kitchen island to life.
Step-by-Step Assembly Instructions
With your tools and materials at the ready, it’s time to dive into the assembly of your custom kitchen island. Follow these steps to ensure a smooth construction process:
- Begin by constructing the base frame, which will support the entire structure. This includes making the legs and attaching the rails.
- Secure the long rails to the legs, ensuring they are perfectly aligned.
- Measure and install the long stretchers to connect the rails, adding stability.
- Attach the short rails, completing the frame.
Remember, precision is key—measure twice, cut once. If you encounter any uncertainties, refer to detailed guides or instructional videos for clarification.
Keep a close eye on the alignment during each step. A misaligned frame can lead to issues with drawers and doors later on.
Once the frame is set, you can move on to installing the countertop, shelving, and any other functional features you’ve planned for. The satisfaction of seeing your kitchen island take shape is unmatched, and with careful attention to detail, you’ll be on your way to a professional-looking finish.

Get rid of gnats in your home with our awesome tips!
Adding the Finishing Touches
With the structure assembled, it’s time to add those final details that transform your kitchen island from a simple construction to a customized centerpiece. Apply multiple thin coats of paint or stain for a flawless finish, allowing each layer to dry thoroughly before adding the next. This meticulous process ensures a professional look without visible brush strokes.
Ensure every surface is properly covered for a durable and attractive appearance.
Remember, the finishing touches are not just about aesthetics but also about ensuring longevity and ease of maintenance. Consider adding a protective topcoat to shield your island from daily wear and tear.
Lastly, install any hardware such as drawer pulls or door handles. This is the moment where your personal style shines through, so select pieces that complement your kitchen’s overall design.
Customization and Personalization
Choosing Between Drawers and Shelving Options
When planning your custom kitchen island, storage is a key consideration. Drawers offer organized spaces for utensils, cookware, and small appliances, while shelving provides easy access and display options for decorative items and frequently used dishes.
Material choice impacts both aesthetics and durability. Solid wood, MDF, and Thermofoil are popular options, each with its own benefits. For instance, solid wood drawer boxes with dovetail joints signify quality and longevity.
Remember, the right storage solution should balance functionality with the overall design theme of your kitchen.
With over 10,000 variations, including trash components, open slatted shelving, and drawers, customization is limitless. Your choice should reflect your lifestyle and the way you use your kitchen.
Integrating Trash and Recycling Units
Incorporating a trash and recycling unit into your custom kitchen island not only enhances functionality but also contributes to a cleaner and more organized space. Choose between a tilt-out unit or a cabinet door with shelving to suit your design and practical needs. Consider the following options for your island:
- Trash or Cabinet
- Hardware Color
- Hardware Type
- Wheels (for mobility) or Stationary
- Door Placement (left or right side)
Remember, the size of your island will determine the number of drawers or shelving units that can be included. High-grade ball bearing drawer glides and, if desired, industrial-strength locking casters can be added for premium quality and convenience.
When selecting your unit, ensure that it aligns with the aesthetic of your kitchen and meets your functional requirements. The right choice can make a significant difference in the ease of maintaining a tidy kitchen.
Customer feedback often highlights the importance of personalizing these units to fit the unique dimensions and style of your kitchen. Take the time to specify your preferences to receive a unit that perfectly captures your vision.
Selecting Countertops: Butcher Block and Beyond
When it comes to selecting the perfect countertop for your custom kitchen island, the options are vast and varied. Butcher block countertops offer a warm and inviting look, often made from teak or other hardwoods, and come fully sealed and conditioned. They’re not just about aesthetics; they’re also highly functional, doubling as a food prep area and, with the right care, can last for years.
Marble remnants can add a touch of elegance to your kitchen island. The thickness and dimensions of the marble will dictate the necessary support and adjustments to the island’s height. Remember, factors influencing style choices for countertops include backsplashes, edges, and material selection between marble and granite. Considerations extend to other spaces and applications, with differences in aesthetics, maintenance, and cost between the two materials.
With every countertop purchase, consider the added value of complimentary items such as a cutting board. These small touches can enhance the overall functionality and appeal of your kitchen island.
To help you decide, here’s a quick comparison:
- Butcher Block: Warm, natural look; requires regular maintenance; ideal for cutting and chopping.
- Marble: Elegant, timeless appeal; higher maintenance; best for baking and rolling dough.
- Granite: Durable, less maintenance; great for heavy use; resists heat and scratches.
Installation and Setup
Securing the Island to the Floor
Ensure your kitchen island remains stationary and secure by properly fastening it to the floor. This step is crucial for both safety and functionality. Depending on the type of flooring and island structure, the methods may vary.
- For wooden floors, use lag bolts that are long enough to anchor into the joists.
- On concrete, masonry anchors will provide a solid hold.
- If you’re installing over tile, be sure to use a diamond drill bit to prevent cracking.
Remember to check for any underlying pipes or wiring before drilling into the floor.
Always follow the manufacturer’s instructions for the specific hardware you’re using. This will ensure a stable and long-lasting installation.
Aligning with Existing Cabinetry and Appliances
Ensuring your new kitchen island aligns with existing cabinetry and appliances is crucial for a seamless look and functional flow. Measure twice, cut once—this age-old adage holds true when fitting your island into the existing kitchen layout. Precise measurements prevent costly mistakes and ensure that your island complements the surrounding space.
Alignment is not just about the physical fit; it’s about aesthetic harmony as well. Consider the color, style, and hardware of your current cabinets and appliances. Your island should enhance, not clash with, these elements. Here’s a simple checklist to guide you:
- Match the island’s height with adjacent countertops
- Ensure there’s adequate walkway space around the island
- Align the island’s finish with existing cabinetry
Remember, the island is a central hub in the kitchen. It should integrate smoothly with the rest of your kitchen, both in design and function.
Ensuring Stability and Safety
Ensuring the stability and safety of your custom kitchen island is paramount. Test the stability by gently shaking the island to detect any movement. If it feels loose, additional measures may be needed to secure it firmly to the floor.
Anchor bolts are essential for a secure installation. Tighten them until the island is immovable, ensuring a safe and stable kitchen centerpiece. Remember, a wobbly island is not just a nuisance but a safety hazard.
It’s crucial to periodically check the stability of your kitchen island. Even with proper installation, changes in flooring or wear and tear can affect its security over time.
For added safety, consider the weight distribution of your island. If you’re incorporating heavy elements like stone countertops or built-in appliances, additional support may be necessary to maintain balance and prevent tipping.
Maintenance and Care

Protecting Wood Surfaces
To maintain the beauty and integrity of your kitchen island’s wood surfaces, regular sealing is essential. Choose a sealant that’s appropriate for the type of wood and the intended use of the island. For example, a water-resistant sealant is crucial for areas exposed to moisture.
- Untreated pine can be cost-effective, but ensure it’s thoroughly sealed.
- High-quality paint with a semi-gloss finish can prevent greasy fingerprints and is easier to clean.
- Avoid matt finishes as they show every mark.
Remember, the right paint for wood should not require an additional protective layer. It’s designed to withstand daily use.
For high traffic areas, consider a durable top coat that can withstand frequent cleaning without the need for reapplication. Consult resources like the HomeLivingCentral website for guides on maintaining various materials, including wood surfaces.
Routine Cleaning and Upkeep
Keeping your custom kitchen island in pristine condition requires regular maintenance. Start by clearing the surface and any shelves or drawers. Use a mild detergent or a specialized cleaner suitable for the material of your island, whether it’s wood, laminate, or stone. For wood surfaces, a mixture of warm water and mild soap is often sufficient, but always wring out the cloth well to avoid water damage.
Weekly Cleaning Routine:
- Wipe down surfaces with a soft cloth
- Clean handles and knobs
- Vacuum or sweep under the island
- Address spills immediately to prevent stains
Remember to avoid abrasive cleaners or pads that can scratch or dull the finish. For a deeper clean, consider a seasonal decluttering and reorganization of your island’s storage components. This not only keeps your island looking great but also ensures that everything remains functional and accessible.
Consistency in cleaning habits will extend the life of your kitchen island and keep it looking as good as new.
When to Refinish or Repaint
Understanding when to refinish or repaint your kitchen island is crucial for maintaining its beauty and longevity. Regular maintenance is much easier than extensive repairs. If you notice any signs of wear or damage, it’s time to consider a touch-up.
- Look for fading color, scratches, or chips in the paint.
- Assess the smoothness of the surface; roughness indicates wear.
- Pay attention to areas with high usage, as they wear down faster.
Refinishing or repainting your kitchen island not only refreshes its appearance but also provides an opportunity to change the style or color scheme to match evolving tastes or kitchen renovations.
Remember, a light distressing can be intensified, but overdoing it requires repainting. For a professional finish, after painting, give your cabinets a final sand with fine grit sandpaper or steel wool to eliminate imperfections. The paint finish will be more durable if you apply multiple thin coats rather than a thick one.
Conclusion
Embarking on the journey to build your own custom kitchen island can be a fulfilling and creative endeavor. With the guidance provided in this article, you’re now equipped with the knowledge to design and craft a kitchen island that not only enhances the functionality of your space but also adds a personal touch to your home. Remember, the process is as important as the final product, so take pride in each step, from selecting the perfect wood to applying the final coat of paint. Whether you’re a seasoned DIYer or a beginner, the satisfaction of creating something with your own hands is unparalleled. As you enjoy your new kitchen island, know that it’s a testament to your craftsmanship and the love you have for your home.
Frequently Asked Questions
How do I determine the perfect size for my kitchen island?
Start by considering the layout of your kitchen and the space available. Ensure there’s enough room for walkways and opening appliance doors. You can also use the dropdown menu to select specific sizes and consider if you want an overhang for seating.
Can I customize the color and materials for my kitchen island?
Absolutely! You can choose your paint color preference from the dropdown menu or request a custom color for an additional fee. The kitchen island is made entirely out of solid wood, with options for shiplap or picture frame styles.
What functional features can I incorporate into my kitchen island?
You can choose from over 10,000 variations, including trash components, cabinets, open slatted shelving, drawers, wheels, and overhang for seating. Each kitchen island is handcrafted to order, allowing you to get exactly what you’re looking for.
How is the kitchen island secured to the floor during installation?
The island can be secured using support brackets or legs provided, ensuring stability and safety. For a floating kitchen island, alternative installation methods that don’t require attachment to the floor are available.
How should I maintain and care for my wooden kitchen island?
Protect wood surfaces by sealing and conditioning them, especially if you choose a teak butcher block countertop. Routine cleaning and upkeep are essential, and you may need to refinish or repaint the island when it shows signs of wear.
Is it possible to get assistance or inspiration before making a purchase?
Certainly! Feel free to connect with us for more comfort in your purchase decision. Check out our Instagram page @wood_you_build_it for inspiration, and rest assured with our proven 5-star track record on Etsy.