Removing outdated wallpaper can be a daunting task, but with the right approach, it’s an achievable DIY project. This guide provides you with expert tips and steps to effectively strip away old wallpaper, leaving your walls ready for a fresh new look. Whether you’re dealing with traditional or vinyl wallpaper, using a steamer or opting for alternative methods, we’ve got you covered with the best practices for a clean and smooth removal process.
Contents
- 1 Preparing for Wallpaper Removal
- 2 The Removal Process
- 3 Special Considerations
- 4 Cleaning and Post-Removal Care
- 5 Conclusion
- 6 Frequently Asked Questions
- 6.1 Do I need to score the wallpaper before removing it?
- 6.2 Can I remove wallpaper without hiring a professional?
- 6.3 What should I do if the wallpaper doesn’t come off easily?
- 6.4 How do I remove wallpaper glue after taking off the paper?
- 6.5 Is it possible to remove wallpaper without a steamer?
- 6.6 How should I clean the walls after removing wallpaper?
Key Takeaways
- Score the wallpaper before removal to allow water and soap to penetrate and loosen the glue, making it easier to strip.
- Use a steamer for efficient wallpaper removal, especially for textured or stubborn wallpapers that are difficult to peel off.
- Apply a wallpaper remover solution to tackle tough areas, and work in small sections for best results.
- After wallpaper removal, ensure all glue residue is eliminated by rinsing the walls with warm water and wiping them clean.
- Protect your space by moving furniture and covering floors to prevent damage from water, soap, or debris during the removal process.
Preparing for Wallpaper Removal
Score the Wallpaper
Scoring the wallpaper is a crucial first step in the removal process. Use a professional scoring tool to create small perforations in the paper, which allows for the wallpaper remover to penetrate and break down the adhesive. It’s important to apply just enough pressure to puncture the facing without damaging the underlying wall.
After scoring, it’s beneficial to sponge down the wall with water, possibly with a bit of soap, to begin the saturation process.
Following the scoring, apply hot water to the wall and wait for about 15 minutes to allow for thorough saturation. This will make the wallpaper easier to peel or scrape off. Work in sections to maintain the water’s temperature and effectiveness.
Protect Your Space
Before diving into the wallpaper removal process, it’s crucial to prepare your workspace to avoid any unnecessary mess or damage. Start by clearing the walls of any decorations, including vents, and cover all electrical outlets with masking tape to prevent moisture intrusion.
Ensure all furniture is either removed from the room or placed in the center and covered with plastic sheets for protection.
To safeguard your floors, lay down plastic sheets and secure them with masking tape, checking that they remain in place when walked on. This simple step helps prevent water damage and makes cleanup a breeze.
By taking these precautions, you’ll create a safe environment that allows you to focus on the task at hand without worrying about the aftermath.
Gather The Necessary Tools and Materials
Before diving into the wallpaper removal process, ensure you have all the necessary tools and materials at hand. Proper preparation can significantly streamline the task ahead.
- Drop cloth
- Pump sprayer
- Wallpaper scoring tool
- Ladder
- Wall scraper
- Non-cellulose sponge
- Painter’s tape
- Liquid fabric softener
- Trash bags
Each item serves a specific purpose, from protecting your floors with a drop cloth to softening the adhesive with liquid fabric softener. A wall scraper, particularly the WP CHOMP! 52016, is crucial for tackling tough areas. This scraper is designed to minimize wall damage and has a replaceable blade for extended use.
Ensure your safety with protective clothing, goggles, and a mask. This not only keeps you clean but also shields you from any potential irritants during the removal process.
The Removal Process
Using a Steamer
A wallpaper steamer can be a game-changer in the removal process. Fill the steamer with water and allow it to heat up. Once ready, apply the steamer pad to the wallpaper surface, section by section, to loosen the wallpaper paste. This method is especially effective for stubborn wallpapers.
- Start at the top of the wall and work your way down.
- Hold the steamer pad against the wall for about 30 seconds before moving on to the next section.
- Use a scraping tool to gently peel away the wallpaper as it loosens.
Safety is paramount. Ensure you wear protective gloves and goggles to prevent burns or irritation from steam.
Remember to work in manageable sections and take breaks to avoid overheating the steamer. With patience and careful application, the wallpaper should peel away with ease, revealing the clean wall beneath.
Applying Wallpaper Remover
For those tough-to-remove sections, a wallpaper remover can be a game-changer. Apply the remover generously with a sponge or brush, ensuring the solution penetrates the wallpaper. It’s crucial to tackle small areas at a time to prevent the solution from drying out before the paper is peeled away.
- Saturate the wallpaper thoroughly.
- Allow the solution to sit for several minutes.
- Begin peeling the wallpaper from the edges.
Instant penetration of the remover is essential for effective wallpaper removal. If you’re using a commercial product like Chomp World’s Best Wallpaper Stripper, follow the manufacturer’s instructions for the best results.
When using a wallpaper remover, patience is key. Allow the solution to do the heavy lifting, softening the adhesive for easier scraping.
Scraping Techniques
Once the wallpaper has been sufficiently loosened by your chosen removal method, it’s time to start scraping. Use a dedicated wallpaper scraper to gently lift and peel away the old wallpaper. The right tool is crucial to avoid damage to the wall surface.
Scrapers come in various shapes and sizes, designed to tackle different types of wallpaper and adhesives. For stubborn areas, consider using a multi-purpose scraper with a roller to reduce resistance and prevent gouging.
After all the wallpaper is removed, clean the wall thoroughly using a scraping tool or a sponge with warm water or diluted white vinegar. Ensure the wall is completely dry before proceeding with any further renovations or painting.
When scraping, work in small sections and be patient. Rushing the process can lead to wall damage or incomplete removal.
Special Considerations
Removing Traditional Wallpaper
Traditional wallpaper removal requires patience and the right approach. Start by mixing hot water with a wallpaper stripping solution according to the product’s instructions. Transfer this mixture into a spray bottle for easy application.
- Apply the solution generously to the wallpaper.
- Allow it to soak in to loosen the adhesive.
- Begin scraping at a corner with a putty knife or scraper.
For areas that resist, a wallpaper remover may be necessary. Apply it with a cloth or brush, working in small sections to prevent the solution from drying out. Once the wallpaper is removed:
Clean the walls with soap and warm water to eliminate any residue. Let the walls dry for at least 24 hours before repainting or re-wallpapering.
Dealing with Vinyl Wallpaper
Vinyl wallpaper presents a unique challenge due to its water-resistant nature. Start by lifting the corners at the top of the wall using a putty knife or wall scraper. This allows you to peel away the top vinyl layer, which often comes off in large strips.
Once the top layer is removed, apply a wallpaper remover to penetrate and dissolve the adhesive. A mixture of hot water and vinegar can aid the process, as the hot water loosens the wallpaper glue, and the vinegar dissolves it, making it easy to scrape off.
Use a scraper at a slight angle to avoid damaging the walls while removing the bottom layer of wallpaper.
After all the wallpaper is removed, clean the walls with soapy water to eliminate any remaining adhesive or paste. This final step ensures that your walls are prepared for their next treatment, whether that’s a fresh coat of paint or new wallpaper.
Alternatives to Using a Steamer
If you’re looking to remove wallpaper without the hassle of a steamer, there are several effective methods to consider. Mixing a solution of fabric softener and water is a popular alternative. Simply combine equal parts of each in a spray bottle and apply generously to the wallpaper. This method is not only cost-effective but also less messy compared to steamers.
Another approach involves using a bladed tool to score the wallpaper before applying any liquid solution. However, be cautious as this can sometimes damage the underlying wall surface. It’s essential to use gentle pressure and avoid over-scoring.
For a more natural solution, warm water alone can be surprisingly effective. Soak the wallpaper thoroughly and allow it to penetrate for several minutes before attempting to peel or scrape it off.
Remember to test a small area first to ensure that your chosen method does not adversely affect the wall or wallpaper. With patience and the right technique, you can achieve a clean removal without the need for a steamer.
Cleaning and Post-Removal Care
Removing Wallpaper Glue
Once the wallpaper is down, you’ll likely encounter stubborn glue residue. Gently wipe the softened glue with a damp towel or rag to remove most of it. For any remaining bits:
- Dampen the area with a cleaning solution
- Allow a few minutes for the solution to loosen the glue
- Carefully scrape with a putty knife
Be cautious to avoid damaging the wall surface while scraping.
If you find the glue particularly resistant, consider using a wallpaper glue remover. Apply it according to the manufacturer’s instructions, and then proceed with the wiping and scraping method.
Rinsing the Walls
Once the wallpaper glue is thoroughly removed, rinse the walls with warm water to eliminate any leftover cleaning solution. It’s essential to tackle this in manageable sections, ensuring a thorough rinse throughout the room. Allow the walls to dry completely before proceeding to the next steps in your renovation project.
After rinsing, inspect the walls for any missed spots of glue or residue. A second pass may be necessary to ensure a pristine surface ready for its new finish.
To prepare your walls for a fresh coat of paint or new wallpaper, consider the following steps:
- Repair any damage to the drywall.
- Sand down spackle or joint compound to create a smooth surface.
- Clean the walls to remove any dust or debris.
- Remove outlet covers to avoid paint or wallpaper edges.
These steps will help create a clean canvas for whatever new design you choose.
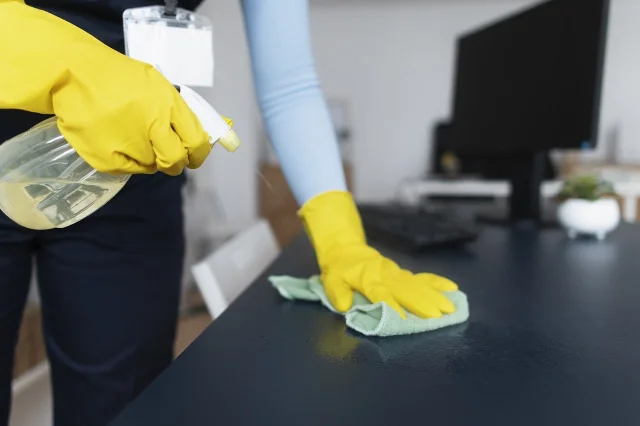
Cleaning Walls After Wallpaper Removal
Once the wallpaper has been stripped away, it’s crucial to thoroughly clean the walls to ensure a smooth surface for painting or new wallpaper application. Start by wiping the walls with a mixture of soap and warm water, effectively removing any leftover adhesive residue. Allow the walls to air dry completely, which may take at least 24 hours.
For a more detailed clean, consider using a commercial remover. Apply the remover according to the manufacturer’s instructions, then rinse the walls with warm water. Use a sponge for best results and repeat the process until the walls are free of any glue and debris.
Ensure that the walls are impeccably clean and dry before moving on to the next step in your renovation project. This will help prevent any issues with paint adhesion or wallpaper application in the future.
If you’re preparing the walls for painting, a final wipe with TSP (trisodium phosphate) or a similar cleaning agent can help to neutralize any remaining stickiness and provide a pristine surface for the new coat.
Conclusion
Removing wallpaper can be a daunting task, but with the right approach and tools, it’s an achievable DIY project. By scoring the wallpaper, using a steamer or wallpaper remover, and meticulously scraping off the layers, you can strip your walls back to their bare state. Remember to rinse the walls thoroughly after removal to eliminate any residual glue, ensuring a clean surface for your next design venture.
Whether you’re updating with fresh paint or new wallpaper, the effort you put into proper removal will pave the way for a smoother, more professional-looking finish. So roll up your sleeves, arm yourself with patience and our expert tips, and transform your space with confidence.
Frequently Asked Questions
Do I need to score the wallpaper before removing it?
Yes, scoring the wallpaper by making small holes in the paper helps the water and soap to penetrate and loosen the glue, making removal easier. Use a professional scoring tool to avoid damaging the walls.
Can I remove wallpaper without hiring a professional?
Absolutely, with the right tools and techniques, you can remove even the most stubborn wallpaper on your own. Follow a step-by-step guide to do it effectively.
What should I do if the wallpaper doesn’t come off easily?
For stubborn areas, apply a wallpaper remover with a cloth or brush until the wallpaper begins to peel. Work in small sections for the best results.
How do I remove wallpaper glue after taking off the paper?
You can use a variety of methods to remove wallpaper glue. A common approach is to rinse the walls with warm water to remove any residue and repeat the process until all the glue is gone.
Is it possible to remove wallpaper without a steamer?
Yes, if you don’t have a steamer, you can use alternative methods such as water solutions or other handy tips and tricks to remove the wallpaper.
How should I clean the walls after removing wallpaper?
After removing the wallpaper and adhesive, wipe the walls clean with a damp cloth. If necessary, use a stiff bristle brush for stubborn spots. Ensure the walls are clean before applying paint or new wallpaper.