Tiling a bathroom floor around a toilet requires careful planning and execution to ensure a professional and durable finish. From preparing the floor to the final touches, each step of the process is critical. This article will guide you through the necessary steps, including selecting the right tiles and ensuring they are laid correctly, to transform your bathroom with a new tiled floor.
Contents
- 1 Key Takeaways
- 2 Preparing the Bathroom Floor for Tiling
- 3 Choosing the Right Tiles for Your Bathroom
- 4 Laying the Tiles Around the Toilet Area
- 5 Grouting and Sealing the Bathroom Floor
- 6 Finishing Touches and Maintenance
- 7 Conclusion
- 8 Frequently Asked Questions
- 8.1 Do I need to remove the toilet before tiling the bathroom floor?
- 8.2 How do I ensure the floor is level before tiling?
- 8.3 Is a waterproofing membrane necessary for bathroom floors?
- 8.4 Can I mix different tile patterns in the bathroom?
- 8.5 How do I cut tiles to fit around the toilet flange?
- 8.6 What’s the best way to maintain my newly tiled bathroom floor?
Key Takeaways
- Properly removing the toilet and preparing the bathroom floor, including cleaning, leveling, and waterproofing, is essential for a successful tile installation.
- Choosing the right tiles involves considering the style, such as subway tiles, and ensuring they are suitable for bathroom conditions, while grout selection affects both durability and aesthetics.
- Accurate measuring and cutting of tiles are crucial, especially when navigating curves and obstacles around the toilet, to maintain proper alignment and spacing.
- Grouting and sealing are vital steps to protect the tiled floor from moisture and to achieve a clean, finished look; these steps also contribute to the longevity of the flooring.
- Final touches, including reinstalling the toilet and caulking, are important for a watertight seal, while routine maintenance will keep the tiled floor looking its best.
Preparing the Bathroom Floor for Tiling

Removing the Toilet
Before tiling can commence, the toilet must be carefully removed to ensure a smooth surface for tile installation. Shut off the water supply and flush the toilet to drain the tank. Disconnect the water line and unscrew the bolts anchoring the toilet to the floor. Gently rock the toilet to break the wax seal and lift it away from the flange.
italics Ensure all old wax is scraped off and the area is clean before proceeding. Place the toilet in a secure area to avoid damage.
With the toilet removed, you now have unobstructed access to the entire floor, allowing for precise tile fitting and a professional finish.
When cutting tiles to fit around the toilet flange, start from the outside edges and work your way in. This technique helps to avoid unnecessary waste and ensures a cleaner cut. Save the more intricate cuts for last, ensuring they fit snugly around the flange.
Cleaning and Leveling the Floor
Once the floor is clean and level, it’s time to apply a waterproofing membrane. This step is crucial to prevent water damage and ensure the longevity of your bathroom floor. Spread the membrane evenly, covering all exposed areas.
Waterproofing is not just about applying the product; it’s about creating a barrier that protects the subfloor. Follow the manufacturer’s instructions for the best results.
Ensure the entire floor is covered, with special attention to the edges and corners where water is most likely to penetrate.
Here’s a quick checklist to guide you through the process:
- Ensure the floor is dry and dust-free
- Cut the membrane to size
- Apply the membrane according to the product instructions
- Allow sufficient drying time before beginning to tile
Applying Waterproofing Membrane
Once the floor is clean and level, it’s time to apply a waterproofing membrane. This step is crucial, especially in wet areas, to provide additional moisture protection. Measure your plywood or backer board and cut it to fit the space. Use a jigsaw for precision cutting and drill small holes for securing the membrane.
Apply an SBR or acrylic primer to the surface to ensure a grippy base for the tiles. Avoid using PVA primers as they can damage the backing board. After priming, the waterproofing membrane can be laid down, starting from one corner and working outward. This creates a barrier that helps prevent water damage to the subfloor.
Ensure the entire area is covered with the membrane, overlapping edges by at least two inches for a watertight seal.
Once the membrane is in place, you’re ready to move on to the next step: choosing the right tiles for your bathroom.
Choosing the Right Tiles for Your Bathroom
Considering Subway Tile Options
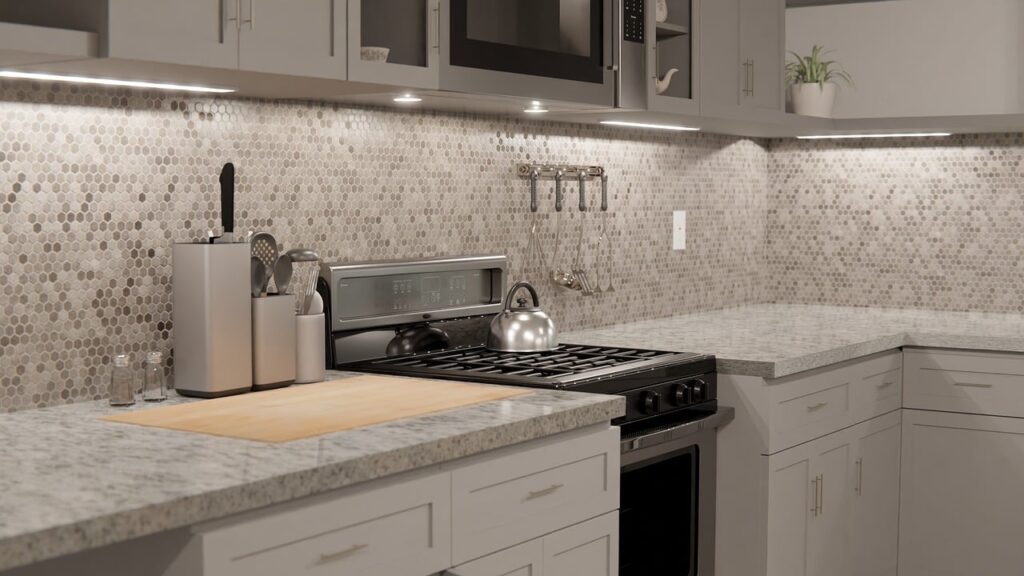
Subway tiles offer a timeless look and a cost-effective solution for bathroom renovations. Their classic appeal and versatility make them a popular choice for both walls and floors. With a variety of colors and finishes available, subway tiles can be the main feature or act as a neutral backdrop for accent tiles.
Affordability and adaptability are key when selecting subway tiles. They can easily blend with different design styles and complement other types of tiles. For instance, pairing white subway tiles with a contrasting honeycomb pattern on the floor can create a harmonious yet striking effect.
- White subway tiles with matching grout create a seamless look.
- Larger subway tiles can modernize the traditional aesthetic.
- Accent tiles can add color and character to a subway-tiled bathroom.
When applied en masse, subway tiles not only enhance the aesthetic but also provide reliable water resistance, safeguarding your bathroom walls from moisture damage.
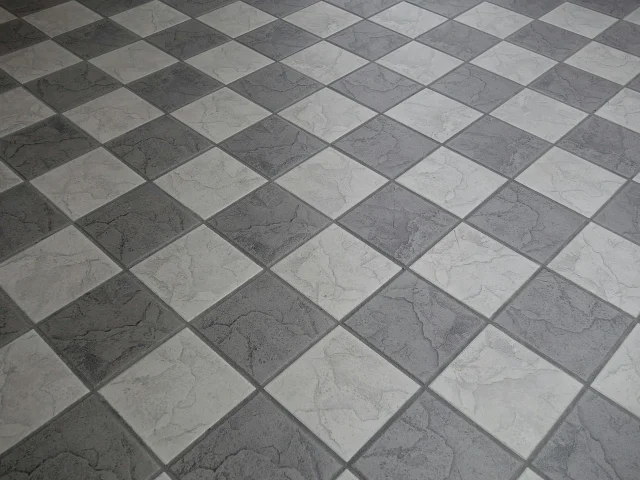
Mixing and Matching Tile Patterns
The art of mixing and matching tile patterns can transform a bathroom from simple to stunning. It’s about creating a balance that complements the overall design. For instance, pairing a classic subway tile with a patterned border can add a touch of elegance. Consider the following tips:
- Use contrasting tiles to define spaces and add visual interest.
- Combine different shapes, like hexagons with rectangles, for a unique look.
- Align patterns in a way that guides the eye through the room.
When selecting tiles, think about how the patterns will flow together. A well-thought-out design can make a small bathroom appear larger and a large bathroom feel more intimate.
Remember to account for the scale of patterns in relation to the room size. Large patterns can overwhelm a small space, while small patterns may get lost in a large area. The key is to achieve harmony between the tiles and the space they occupy.
Selecting Grout for Durability and Aesthetics
When tiling your bathroom, the choice of grout is as crucial as the tiles themselves. Selecting the right grout can enhance the durability of your floor and contribute to the overall aesthetic. Consider the color contrast; for instance, white subway tiles with black grout can create a striking modern look, while wider grout lines add a distinctive accent.
Grout color can also coordinate with other elements in your bathroom, such as countertops or fixtures. A greige finish on glazed subway tiles offers a contemporary edge, maintaining the classic shape while introducing a fresh style.
The longevity of your bathroom floor depends not only on the quality of the tiles but also on the grout used. A well-chosen grout complements the tiles and ensures a cohesive and resilient finish.
Here’s a quick guide to grout selection:
- Color: Choose a color that complements or contrasts with your tiles.
- Width: Decide on the width of the grout lines based on the desired effect.
- Type: Use sanded grout for larger joints and unsanded for narrower spaces.
- Sealing: Opt for a sealed grout to resist moisture and stains.
Laying the Tiles Around the Toilet Area
Measuring and Cutting Tiles Accurately
Proper measurement and cutting are crucial for a seamless tile installation. Ensure each tile fits perfectly around the toilet base by using a contour gauge to replicate complex shapes. Here’s a simple guide:
- Measure the space where the tile will be placed.
- Mark the tile with a pencil where cuts are needed.
- Use a tile cutter for straight cuts and a tile saw for curves.
- Smooth the edges with a sanding stone to prevent chipping.
Accuracy in cutting not only affects the tile’s fit but also the overall aesthetic of your bathroom floor.
Remember to double-check measurements before cutting, as tiles cannot be uncut. For intricate cuts, consider creating a cardboard template as a trial run. This extra step can save time and materials in the long run.
Tiling around the toilet requires precision, especially when dealing with curves and obstacles. Measure twice, cut once to ensure tiles fit snugly against the toilet’s base and other fixtures.
- Use a contour gauge to replicate complex shapes.
- Mark tiles with a pencil where cuts are needed.
- Employ a wet saw for accurate and clean cuts.
Patience is key when navigating these tricky areas. Small adjustments can make a big difference in the final appearance.
Ensure proper dry fitting before applying adhesive. This step allows you to make necessary adjustments without the pressure of drying glue.
Remember to double-check the tile alignment after each piece is placed to maintain a consistent pattern and spacing.
Ensuring Proper Tile Alignment and Spacing
Achieving a professional finish when tiling a bathroom floor hinges on ensuring proper tile alignment and spacing. This critical step prevents uneven lines and unsightly gaps that can detract from your bathroom’s overall appearance. To start, dry-lay your tiles to determine the best layout, which often involves centered rows with equal spaces at the walls. Adjust the rows to find the optimal layout before adhering the tiles permanently.
Consistent spacing is key to a symmetrical finish. Use tile spacers to maintain uniform gaps between tiles, and regularly check the alignment with a level. This will help you avoid the frustration of misaligned tiles and the need for rework.
Here’s a quick checklist to keep you on track:
- Measure the area to be tiled accurately.
- Use tile spacers for even spacing.
- Check alignment with a level after laying each tile.
- Adjust tiles promptly before the adhesive sets.
Grouting and Sealing the Bathroom Floor
Mixing and Applying Grout
Once your tiles are set and the adhesive has cured, it’s time to mix the grout. Following the manufacturer’s instructions is crucial for a successful application. Mix in small batches to maintain consistency and workability. Aim for a peanut butter-like texture, which is ideal for spreading.
- Pour the grout powder into a clean bucket.
- Add water gradually, mixing as you go.
- Use a margin trowel for thorough mixing.
- Let the mixture slake, or rest, if required by the product.
Ensure the grout is free of lumps and has reached the correct consistency before applying.
Applying the grout requires patience and attention to detail. Fill the grout float and press the grout firmly into the tile joints, moving diagonally across the tiles to avoid dipping into the joints. Wipe away excess grout with a damp sponge, rinsing frequently to avoid grout haze on the surface of the tiles.
Cleaning Excess Grout and Haze
After grouting your bathroom floor, it’s crucial to clean any excess grout and haze to ensure a professional finish. Start by using a damp sponge to wipe away the majority of the excess grout from the tiles. Be careful not to press too hard and disturb the freshly laid grout in the joints.
Once the bulk of the grout is removed, tackle the haze that remains. A homemade solution of equal parts water and white vinegar can be effective for this task. Spray the mixture onto the tiles and gently scrub with a soft brush or cloth. Rinse the area with clean water and dry with a towel.
Consistency is key when cleaning the grout haze. Work in small sections to maintain control and avoid missing spots.
Finally, allow the floor to dry completely before walking on it or applying a sealant. This step is essential for the longevity of your tiling work.
Sealing Tiles for Longevity
After grouting, the final step to ensure your bathroom floor remains pristine is sealing the tiles. This process not only enhances the aesthetics of your tiles but also provides a protective barrier against moisture and stains.
Sealing is a crucial step for maintaining the integrity of your tiled floor over time.
Sealing should be done with a quality sealant, appropriate for the type of tile you have installed. Follow the manufacturer’s instructions for the best results. Here’s a simple guide to sealing your tiles:
- Ensure the grout is fully cured.
- Clean the surface thoroughly.
- Apply the sealant evenly.
- Allow it to dry completely.
By taking the time to seal your tiles, you are investing in the longevity and durability of your bathroom floor.
Finishing Touches and Maintenance
Reinstalling the Toilet
With the tiles sealed and the floor ready, it’s time to reinstall the toilet. This step is crucial for the functionality and aesthetics of your bathroom renovation. Begin by aligning the toilet flange with the newly laid tiles. Ensure the wax ring is in place before setting the toilet onto the flange. Press down firmly to create a watertight seal.
Once the toilet is positioned, secure it by tightening the bolts at the base. Be careful not to over-tighten, as this can crack the porcelain.
Next, attach the toilet tank. Place the toilet tank onto the bowl and align the bolt holes. Insert bolts through the holes and secure them with nuts, tightening evenly. Connect the water supply line and turn on the water to fill the tank. Check for leaks and proper flushing action before considering the job complete.
Caulking for a Watertight Seal
After the tiles are laid and grouted, it’s crucial to apply a bead of caulk around the base of the toilet. This ensures a watertight seal, preventing moisture from seeping underneath the toilet and causing damage. Use a high-quality silicone caulk designed for bathrooms, as it offers better mold and mildew resistance.
Apply caulk smoothly and evenly, wiping away any excess with a damp cloth for a clean finish.
Here’s a simple checklist for caulking:
- Choose the right color caulk to match your tiles and grout
- Cut the caulk tube nozzle at a 45-degree angle for easier application
- Smooth the caulk bead with a caulking tool or your finger
- Allow the caulk to cure for 24 hours before using the bathroom
Routine Cleaning and Care for Tiled Floors
Maintaining the pristine condition of your bathroom tiles requires regular attention. Immediately after showering, use a squeegee or a clean microfiber cloth to wipe down the tiles. This simple act prevents hard water stains and soap scum from building up.
For a deeper clean, a weekly mopping with a gentle cleanser will keep your tiles and grout looking sparkling. Always rinse with clean water to avoid leaving any residue.
To protect the longevity of your grout, avoid using harsh chemicals or abrasive tools that can cause damage over time.
Remember to inspect the grout lines periodically for any signs of wear or discoloration. Promptly address any issues to maintain a hygienic and visually appealing bathroom floor.
Conclusion
Tiling a bathroom floor around a toilet is a task that can greatly enhance the aesthetic and functionality of your bathroom. By carefully planning the layout, cutting tiles to fit, and ensuring a proper seal around the toilet base, you can achieve a professional-looking finish. Remember to take your time, measure twice, and cut once to avoid mistakes. With the right tools and a bit of patience, you can create a durable and beautiful tiled bathroom floor that complements the overall design of your space. Whether you opt for classic subway tiles or a more modern pattern, the effort you put into this project will pay off in the long-term value and enjoyment of your bathroom.
Frequently Asked Questions
Do I need to remove the toilet before tiling the bathroom floor?
Yes, you should remove the toilet to ensure a proper tile installation. This allows you to tile beneath the toilet flange and provides a cleaner, more professional finish.
How do I ensure the floor is level before tiling?
You can use a long level or a laser level to check for flatness. Fill in low spots with a floor leveling compound and sand down high spots to achieve a level surface.
Is a waterproofing membrane necessary for bathroom floors?
Applying a waterproofing membrane is highly recommended to prevent moisture damage and mold growth, especially in bathrooms where water exposure is common.
Can I mix different tile patterns in the bathroom?
Absolutely, mixing and matching tile patterns can add visual interest to your bathroom. Just ensure the patterns complement each other and the overall design.
How do I cut tiles to fit around the toilet flange?
Measure the area around the toilet flange carefully and use a tile cutter or a wet saw to cut the tiles to fit. You may need to make curved cuts for a precise fit.
What’s the best way to maintain my newly tiled bathroom floor?
Regular cleaning with a pH-neutral cleaner and periodic resealing of the grout lines will help maintain your tiled floor. Avoid harsh chemicals that can damage the tiles or grout.