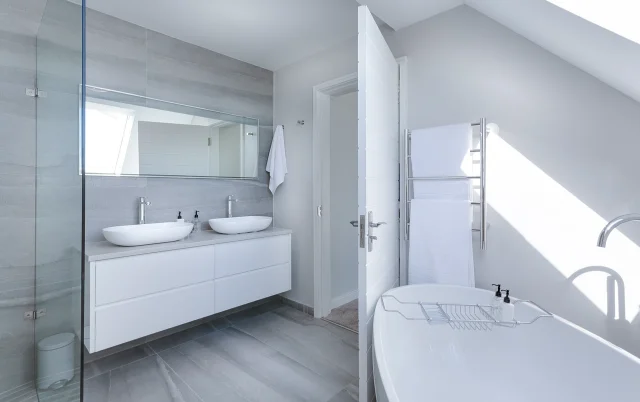
Painting bathroom cabinets: revamping with a fresh coat of paint is an excellent way to breathe new life into your space. This comprehensive guide outlines the steps to prepare, choose the right materials, and apply paint to your bathroom cabinets, ensuring a professional and lasting finish. Whether you’re a seasoned DIYer or a novice looking to tackle your first project, this step-by-step guide will equip you with the knowledge and confidence to transform your bathroom vanity into a modern masterpiece.
Contents
- 1 Key Takeaways
- 2 Preparing Your Bathroom Cabinets for a Fresh Coat
- 3 Choosing the Right Paint and Color
- 4 The Painting Process
- 5 Reassembling and Adding Finishing Touches
- 6 Maintenance and Care for Painted Cabinets
- 7 Conclusion
- 8 Frequently Asked Questions
- 8.1 What kind of paint should I use for bathroom cabinets?
- 8.2 Do I need to sand my cabinets before painting?
- 8.3 How do I choose a paint color for my cabinets?
- 8.4 Can I use a paint sprayer for my bathroom cabinets?
- 8.5 How long should I let the paint cure before reassembling the cabinets?
- 8.6 What maintenance is required for painted bathroom cabinets?
Key Takeaways
- Proper preparation, including cleaning, sanding, and priming, is crucial for a smooth and durable paint job on bathroom cabinets.
- Choosing the right type of paint and finish, such as a semi-gloss enamel, can enhance the durability and resistance to moisture in bathroom environments.
- Trending colors like BEHR’s Rush Hour can modernize the look of your bathroom; always sample colors under your bathroom’s lighting before committing.
- Utilizing a paint sprayer can provide a flawless finish, but it’s important to also master brush and roller techniques for detailed areas and touch-ups.
- After painting, ensure proper drying and curing time, reattach hardware carefully, and maintain the cabinets with regular cleaning and timely touch-ups.
Preparing Your Bathroom Cabinets for a Fresh Coat

Gathering Materials and Tools
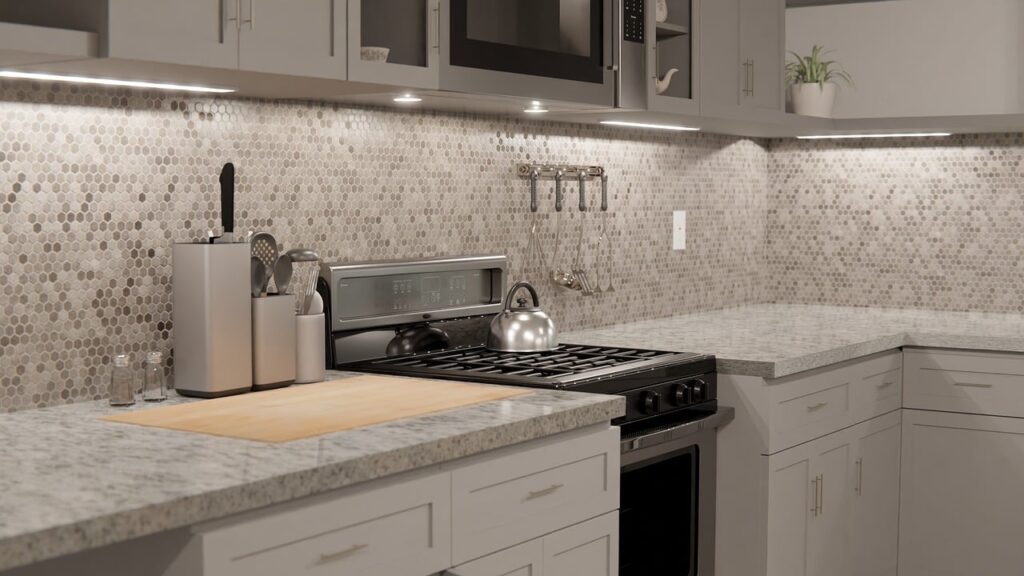
Before diving into the transformation of your bathroom cabinets, it’s crucial to assemble all necessary materials and tools. This preparation step ensures a smooth workflow and helps avoid interruptions once you begin. Start by organizing your workspace and tools, drawing inspiration from modern kitchen updates. Clear any clutter to create a conducive environment for your project.
Materials Needed:
- Zinsser B.I.N. Primer
- Semi-gloss Enamel Paint (e.g., BEHR Marquee in Rush Hour)
Tools Required:
- Very Fine Sandpaper
- HomeRight Paint Sprayer
- Paintbrush and Foam Paint Roller
- HANDy Pro Pail with Liners
- Spray Shelter and Drop Cloths
- Frog Tape and Microfiber Cloths
- Liquid Grease Removal Cleaner (optional)
Ensure you have a dry space to store your materials, planning where to keep everything during the painting process. Precise measurements and organization are key to a flawless finish.
Remember to research your materials thoroughly, gaining knowledge that will empower you to make informed decisions. This step is about nailing down the nuts and bolts of your project, setting the stage for a successful cabinet revamp.
Cleaning and Degreasing
Before applying a fresh coat of paint, it’s crucial to ensure your cabinets are free of grease and grime. Use a high-quality liquid grease removal cleaner to strip away any oily residues. This step is essential for a flawless finish.
- Materials Needed:
- Liquid Grease Removal Cleaner
- Microfiber Cloths
After cleaning, wipe down the cabinets with a wet microfiber cloth to capture loose dust. Follow up with a dry cloth to ensure all surfaces are spotless.
Remember, a clean surface is the key to paint adhesion. Skipping this step can lead to paint peeling and a less durable finish.
Italics are not just for emphasis; they’re a reminder that attention to detail now saves time and effort later.
Sanding for a Smooth Base
Sanding is a pivotal step in preparing your bathroom cabinets for a fresh coat of paint. It’s essential to use a very fine grit sandpaper to avoid scratching the surface. A 220 grit or higher is recommended for the best results. After sanding, it’s crucial to remove all dust to ensure a smooth base for the primer.
- Use a microfiber cloth dampened with water to pick up loose dust.
- Follow with a dry microfiber cloth to ensure all dust is removed.
Proper dust removal after sanding is key to a flawless finish.
Remember, patience during sanding can make a significant difference in the final look of your painted cabinets.
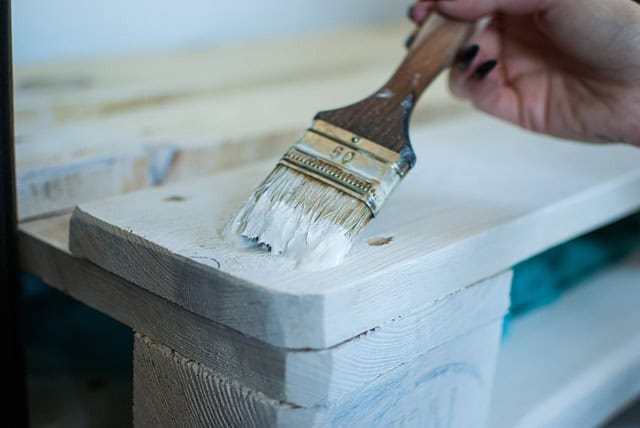
Applying Primer for Lasting Adhesion
Once your cabinets are sanded and dust-free, it’s time to apply primer. Choosing the right primer is crucial for ensuring your paint adheres properly and lasts long. Shellac-based primers like Zinsser B.I.N. are often recommended for their strong adhesion, especially on laminate surfaces.
Primer application can be done with a brush, roller, or sprayer, but be mindful of the product’s specifications. For instance, shellac-based primers should not be used in paint sprayers that are not compatible with such materials, as it can lead to difficult cleanup or even damage to the equipment.
- Ensure the area is well-ventilated.
- Apply an even coat of primer to all surfaces.
- Allow sufficient drying time as recommended by the primer manufacturer.
Remember, the goal is a smooth, even base that will help your topcoat look its best and stand up to the bathroom’s humid environment.
Cleanup is an important consideration. Shellac-based primers require specific solvents for cleaning, so plan accordingly to avoid any mishaps. Always read the product instructions thoroughly before starting your project.
Choosing the Right Paint and Color

Understanding Paint Types for Bathrooms
When selecting paint for bathroom cabinets, durability is key due to the high moisture environment. Latex paints are a popular choice for their ease of use and quick drying time. However, oil-based paints offer superior durability and a smoother finish, making them worth the extra effort for some.
- Latex Paints: Quick drying, easy cleanup with water
- Oil-Based Paints: Longer drying, hard finish, smooth look
For a bathroom setting, a semi-gloss or high-gloss finish is often recommended to withstand humidity and facilitate cleaning. Remember, the right paint can transform your bathroom from mundane to modern with just a few brush strokes.
The choice of paint can greatly influence the longevity and aesthetic appeal of your bathroom cabinets. Consider the balance between practicality and the desired look when making your decision.
Selecting a Durable Finish
When revamping your bathroom cabinets, choosing a finish that can withstand the humid environment is crucial. Semi-gloss enamel paint is a popular choice for its resilience and ease of cleaning. BEHR Marquee’s semi-gloss finish, for example, offers a balance between a subtle sheen and practical durability.
For a factory finish look, a satin finish is also a great option. It provides a lower sheen while still allowing for easy wipe-downs and maintenance. Remember, the finish you select will affect not only the aesthetics but also the longevity of your paint job.
The right finish can transform the feel of your cabinets, providing not only protection but also a touch of elegance to your bathroom space.
Consider the following when selecting your paint finish:
- Durability: High-quality paints like BEHR Marquee promise better coverage and longevity.
- Sheen: Semi-gloss and satin finishes are ideal for bathrooms due to their moisture resistance.
- Maintenance: Choose a finish that is easy to clean and can handle the wear and tear of a bathroom environment.
- Aesthetics: Match the finish to your personal style and the overall design of your bathroom.
Trending Colors for 2024
As we step into 2024, the bathroom cabinet color trends are leaning towards a blend of classic elegance and modern vibrancy. Earthy tones are making a significant comeback, with hues that bring a sense of calm and serenity to your space. On the other hand, bold and saturated colors are also on the rise, providing a statement piece that can transform the entire ambiance of your bathroom.
- Earthy Neutrals: Soft taupe, warm greige, and muted clay
- Bold Statements: Deep navy, rich forest green, and vibrant coral
Choosing the right color can be a daunting task, but it’s essential for creating the atmosphere you desire. Consider the lighting in your bathroom and how it will interact with the paint color at different times of the day. Sampling colors in your own lighting conditions is a crucial step before making your final decision.
When selecting a color, remember that the finish can greatly affect the appearance. A glossy finish will reflect more light and add vibrancy, while a matte finish can soften the color and reduce glare.
Sampling Colors in Your Bathroom Lighting
The interplay of color and light can dramatically alter the appearance of your bathroom cabinets. Test paint samples at different times of the day to see how natural and artificial lighting affect the hue.
- Consider the direction of natural light entering your bathroom:
- North-facing rooms may need warmer tones
- South-facing rooms can handle cooler colors
Remember, the goal is to choose a color that complements your bathroom’s lighting conditions, ensuring a consistent look throughout the day.
When sampling, paint large swatches on a section of the cabinet or on poster board. This allows you to observe the color in context with your bathroom’s unique lighting and decor.
For a cohesive aesthetic, match your chosen paint color with key elements such as tiles, fixtures, and towels. This ensures that the new cabinet color integrates seamlessly into your existing bathroom design.
The Painting Process
Setting Up Your Painting Area
Ensure a clean and controlled environment before you begin painting. A well-organized space is crucial for a smooth painting process. Use a HomeRight Spray Shelter or a similar setup to protect surrounding areas from paint overspray. It’s like setting up a camping tent, quick and efficient.
Clear the area of any unnecessary items and lay down kraft paper or drop cloths to catch drips and spills. Position your painting tools within easy reach to avoid interruptions. Here’s a quick checklist:
- HomeRight Spray Shelter
- Kraft Paper or Drop Cloths
- Zinsser B.I.N. Primer
- Paint Sprayer, Brushes, and Rollers
- HANDy Pro Pail with Liners
Remember to keep your space ventilated. Open windows or use fans to circulate air and reduce fumes.
The HANDy Pro Pail is a game-changer for managing paint and tools without the mess. Its convenience will save you time and frustration. Don’t forget the liners for an effortless cleanup.
Techniques for Using a Paint Sprayer
Using a paint sprayer can significantly speed up the painting process, providing a smooth, even coat over your bathroom cabinets. Keep the sprayer moving at a constant speed to avoid drips and ensure a uniform layer. It’s normal for the first coat to look patchy; a second coat will enhance coverage and durability.
Before starting, dilute your paint to the correct consistency. Follow the instructions provided with your paint sprayer, which may include using a testing funnel. The right dilution is crucial for a flawless finish.
Remember, practice makes perfect. Test your sprayer on a piece of cardboard to get comfortable with the technique before moving on to your cabinets.
For best results, here’s a simple checklist:
- Ensure paint is properly diluted
- Test spray pattern on cardboard
- Apply paint in light, even coats
- Allow sufficient drying time between coats
- Use a second coat for optimal coverage
Brush and Roller Methods for Detailed Areas
While a paint sprayer can quickly cover large surfaces, brushes and rollers are ideal for detailed work. Use a high-quality angled brush to navigate the nooks and crannies of your bathroom cabinets. For larger flat areas, a foam roller provides a smooth finish with minimal texture.
- Use an angled brush for edges and details
- Employ a foam roller for flat surfaces
Floetrol is an additive that can help eliminate brush strokes, ensuring a professional-looking finish. Remember to apply paint with even pressure and to smooth out any excess.
Keep a wet edge to avoid lap marks and ensure a uniform appearance.
For those hard-to-reach areas, consider using a smaller roller to minimize brush strokes. Consistency is key to achieving a seamless look across all surfaces.
Applying Multiple Coats for Even Coverage
Achieving a flawless finish on your bathroom cabinets often requires applying multiple coats of paint. The first coat may appear patchy, but it sets the stage for subsequent layers. For a full and even coverage, a second coat is crucial; it acts as a top coat, enhancing the durability and appearance of your cabinets.
When using a paint sprayer, maintain a constant speed to avoid paint build-up and achieve a light, even coat. If transitioning from dark to light colors, consider an additional coat of primer for better opacity.
Remember, patience is key. Allow adequate drying time between coats to prevent smudging and ensure a smooth finish.
Here are some tips for a perfect application:
- Use high-quality paint like BEHR Marquee for best results.
- Apply with a small roller to minimize brush strokes.
- Additives like floetrol can help eliminate brush marks.
- Sand lightly between coats if necessary for an ultra-smooth surface.
Reassembling and Adding Finishing Touches
Ensuring Proper Drying and Curing Time
After the meticulous painting process, patience is key. Allow the paint to dry and cure properly to ensure a durable finish. It’s recommended to wait at least 24 hours before handling the cabinets. For high-traffic areas, consider extending this period to a full week.
The curing period is crucial for the longevity of your paint job. It solidifies the paint’s adhesion and resistance to daily wear and tear.
To help you plan accordingly, here’s a simple timeline:
- Day 1: Paint application completed
- Day 2-3: Avoid touching, allow surfaces to dry
- Day 4-7: Optional extended curing for high-use areas
Remember, rushing this stage can compromise the quality of your work. Your cabinets will thank you for the extra time with years of beautiful and resilient finish.
Reattaching Hardware and Fixtures
With the paint fully cured, it’s time to bring your bathroom vanity back to life. Carefully reattach the hardware to ensure a snug fit without damaging the new paint job. Use a hardware installation template for precision and consistency across all doors and drawers.
- Align and secure handles or knobs
- Reinstall hinges and door mechanisms
- Attach drawer pulls and latches
Ensure each piece of hardware is properly aligned before tightening screws to avoid misalignment or paint chipping.
Once all the hardware is in place, gently return doors, shelves, and drawers to their respective positions. Double-check that all moving parts operate smoothly and make any necessary adjustments.
Sealing Edges for Moisture Protection
After the paint has dried, it’s crucial to seal the edges of your cabinets to protect against moisture. This step is especially important in a bathroom environment where humidity and water exposure are common. Use a clear silicone caulk to create a waterproof barrier along the edges where the cabinets meet the walls and countertop.
- Apply silicone caulk smoothly along the edges
- Wipe away excess with a microfiber cloth
- Allow the caulk to cure according to the manufacturer’s instructions
Sealing not only protects against moisture but also provides a clean, finished look to your cabinets.
Remember to ventilate the area well during this process to avoid inhaling fumes. Once sealed, your cabinets will be better equipped to handle the daily demands of a bathroom setting, ensuring longevity and maintaining appearance.
Styling Your Revamped Cabinets
With your cabinets freshly painted, it’s time to add the final flourishes that will transform your bathroom into a stylish sanctuary. Accessorize thoughtfully to enhance the look and feel of your space. Consider the following elements to bring your vision to life:
- Knobs and Pulls: Select hardware that complements your cabinet’s color and design.
- Countertop Items: Choose a few decorative items that serve both form and function.
- Linens: Coordinate towels and mats with the new color scheme.
Remember, less is often more. A minimalist approach can highlight your cabinets and create a serene atmosphere.
For a cohesive look, ensure that each item aligns with the overall aesthetic of your bathroom. The right styling can make a significant impact, turning a functional space into a personal retreat.
Maintenance and Care for Painted Cabinets

Regular Cleaning Tips
To maintain the pristine look of your painted bathroom cabinets, regular cleaning is essential. Use a soft, damp microfiber cloth to gently wipe the surfaces, avoiding harsh chemicals that can damage the paint. For tougher stains, a mild detergent can be used sparingly.
- Wipe spills immediately to prevent staining.
- Dust regularly to keep the finish looking new.
- Avoid abrasive cleaners that can scratch the surface.
Consistency in cleaning will not only keep your cabinets looking their best but also extend their lifespan.
Remember, the key to maintaining your cabinets is gentle care and regular attention. This will ensure that they remain a highlight of your bathroom for years to come.
Touch-Up Techniques for Chips and Scratches
Even the most durable paint job can succumb to the occasional chip or scratch, especially in high-traffic areas like the bathroom. Quick touch-ups can make your cabinets look as good as new without a complete repaint. Here’s how to address these minor imperfections:
- Begin by cleaning the affected area with a mild detergent to remove any dirt or grease. Rinse thoroughly and let dry.
- For small chips and scratches, a Multi Surface Touch Up Paint Pen can be an effective tool. It allows you to easily repair scratches, stains, chips, spots, yellowing, and other surface paint imperfections.
- If the scratch is deeper, use very fine sandpaper (220 grit or higher) to gently smooth the area before applying touch-up paint.
- Apply the touch-up paint carefully, using a small brush or the pen’s applicator. Feather the edges to blend with the surrounding area.
Remember, it’s important to choose a touch-up paint that matches your cabinet’s color and finish for a seamless repair.
Protecting Your Cabinets from Humidity and Wear
To ensure your bathroom cabinets withstand the test of time, proper protection against humidity and wear is essential. Moisture can be the enemy of painted surfaces, leading to peeling, warping, and even mold growth. Here are some tips to keep your cabinets in top condition:
- Use exhaust fans during and after showers to reduce humidity levels.
- Wipe down cabinets regularly with a dry cloth to remove moisture.
- Ensure good air circulation by keeping doors ajar or using a dehumidifier.
Sealing edges of cabinets can also prevent water intrusion, which is especially important in high-moisture areas like bathrooms. Additionally, consider using silicone caulk around areas where water exposure is likely.
Remember, maintenance is key to longevity. Regular checks and prompt touch-ups can save you from larger repairs down the line.
Lastly, be mindful of the products you use for cleaning. Harsh chemicals can strip paint and damage finishes. Opt for gentle, non-abrasive cleaners to preserve the beauty and integrity of your painted cabinets.
When to Consider a Repaint
Over time, your painted bathroom cabinets will face wear and tear. Assessing their condition regularly is key to maintaining a fresh look. Consider a repaint if you notice significant fading, peeling, or scratches that can’t be easily touched up.
Fading occurs due to prolonged exposure to light, while peeling might be a sign of moisture issues or improper preparation. Scratches, on the other hand, can accumulate from daily use. Here’s when to think about a new coat of paint:
- When cleaning and touch-ups no longer restore the original appearance.
- If there’s a change in bathroom decor and the current color no longer fits.
- After addressing any moisture or ventilation problems that may have damaged the previous paint job.
Remember, a quality repaint can not only refresh the look but also extend the life of your cabinets.
Lastly, if you’re dealing with rust on metal fixtures or hardware, consider the following methods for removing rust:
- Use a pumice stone for gentle abrasion.
- Apply a mixture of cream of tartar and vinegar for a natural solution.
- Implement preventive measures like regular cleaning and moisture control to avoid rust formation.
Conclusion
Revamping your bathroom cabinets with a fresh coat of paint is a rewarding DIY project that can significantly enhance the look and feel of your space. Throughout this guide, we’ve walked you through the essential steps, from preparation to the final touches, ensuring a professional-grade finish. Whether you’re working with IKEA cabinets or any other type, remember that patience and attention to detail are key. By following the tips and techniques shared, you’ll be able to achieve a durable and stylish outcome that breathes new life into your bathroom. So, grab your supplies, take your time, and enjoy the transformation that comes with a well-executed paint job. Happy painting!
Frequently Asked Questions
What kind of paint should I use for bathroom cabinets?
For bathroom cabinets, it’s best to use a semi-gloss or gloss enamel paint that’s resistant to moisture and easy to clean, such as BEHR Marquee.
Do I need to sand my cabinets before painting?
Yes, sanding is an essential step to create a smooth base for the primer and paint to adhere properly, especially when working with surfaces like IKEA cabinets.
How do I choose a paint color for my cabinets?
Consider trending colors for the year, like those mentioned in the ‘Trending Paint Colors for 2024,’ and test samples in your bathroom lighting to see how they look in your space.
Can I use a paint sprayer for my bathroom cabinets?
Absolutely, using a paint sprayer can give you a smooth, professional-grade finish. Be sure to set up a proper painting area and follow the best tips for using a paint sprayer.
How long should I let the paint cure before reassembling the cabinets?
It’s recommended to let the painted cabinets cure for at least a day or as advised by the paint manufacturer before reassembling and using them.
What maintenance is required for painted bathroom cabinets?
Regular cleaning with non-abrasive cleaners and touch-up techniques for chips and scratches will help maintain your painted cabinets. Also, protect them from humidity and consider a repaint when necessary.