
Keeping the grout on your kitchen floor tiles clean not only enhances the overall look of your kitchen but also extends the life of your floors. Grout can easily become a haven for dirt and grime, especially in high-traffic kitchen areas. In this article, we’ll explore various methods to effectively clean grout, from homemade solutions like baking soda paste to more robust options like steam cleaning and commercial cleaners. We’ll also cover the importance of understanding your tile material, daily and deep cleaning techniques, and tips for maintaining and reviving grout to keep your kitchen floor sparkling.
Contents
- 1 Key Takeaways
- 2 Understanding Your Kitchen Floor Tile Material
- 3 The Baking Soda Method for Cleaning Grout
- 4 Daily and Deep Cleaning Techniques for Kitchen Tiles
- 5 Alternative Grout Cleaning Solutions
- 6 Maintaining and Reviving Your Grout
- 7 Conclusion
- 8 Frequently Asked Questions
- 8.1 What is the best way to clean grimy tile grout on kitchen floors?
- 8.2 How should I clean ceramic kitchen floor tiles?
- 8.3 Can I use a Mr. Clean Magic Eraser for stubborn spots on tile floors?
- 8.4 What should I keep in mind when deep cleaning tile floors?
- 8.5 Are hydrogen peroxide and baking soda effective for cleaning grout?
- 8.6 When should I consider regrouting instead of just cleaning the grout?
Key Takeaways
- Identify your kitchen floor tile material before cleaning to ensure the use of appropriate methods and avoid damage.
- Use a baking soda paste for an effective and eco-friendly way to scrub grout lines clean, followed by thorough rinsing and drying.
- Incorporate daily cleaning routines using mild detergents and the correct mop type to prevent grout discoloration and buildup.
- Consider alternative cleaning solutions such as a hydrogen peroxide and baking soda mix or steam cleaning for tougher stains.
- Regular maintenance and choosing the right cleaner are crucial for grout care, and regrouting may be necessary for a fresh look.
Understanding Your Kitchen Floor Tile Material

Identifying Tile Types: Ceramic and Beyond
When considering how to clean your kitchen floor tiles, it’s crucial to identify the type of tile you have. Ceramic tiles are a common choice due to their ease of cleaning and durability. However, there’s a range of tile materials, each with its own cleaning needs.
Porcelain tiles, for instance, are similar to ceramic but boast a denser composition and better resistance to water absorption. This makes them less susceptible to staining and easier to maintain. On the other hand, tiles without calcium carbonate, such as porcelain and ceramic, offer more cleaning options, including the use of bleach or ammonia.
It’s important to assess the tile’s material as it directly influences the choice of cleaning agents and methods.
Here’s a quick reference to understand the differences:
- Ceramic: Easy to clean, durable, use mild detergent
- Porcelain: Harder, denser, more water-resistant, can handle stronger cleaners
- Others: May require specific care depending on the material
Always avoid acidic cleaners on tiles that contain calcium carbonate to prevent damage.
Assessing Grout Condition Before Cleaning
Before diving into the cleaning process, it’s crucial to assess the condition of your grout. This step will guide the choice of cleaning method and products, ensuring the best results without causing damage. Start by examining the grout for any signs of wear or damage. Look for cracks, chips, or areas where the grout is missing.
Next, evaluate the level of soiling. Is the grout discolored or stained? Are there areas with mold or mildew? These factors will influence the intensity of the cleaning needed.
A thorough assessment helps tailor the cleaning approach to your grout’s specific needs, enhancing effectiveness and preventing harm.
Finally, consider the age of the grout. Older grout may be more fragile and require gentler cleaning methods. If the grout is in poor condition, it might be time to think about regrouting. Use this checklist to ensure a comprehensive evaluation:
- Check for physical damage: cracks, chips, missing pieces
- Identify levels of soiling: stains, discoloration, mold
- Determine grout age: newer vs. older installations
By taking the time to assess your grout, you can select the most suitable cleaning technique, whether it’s a gentle scrub or a more robust deep clean.
Pre-Cleaning Preparations: Tools and Safety
Before embarking on your grout cleaning journey, ensure your workspace is clear of personal items and light furniture for efficiency and thoroughness. Start by gathering the necessary tools and safety equipment to protect yourself and your tiles.
- Gloves: To shield hands from harsh cleaners
- Mask: For respiratory protection against dust and fumes
- Safety goggles: To prevent splashes in the eyes
- Bucket: For mixing cleaning solutions
- Scrub brush: Stiff-bristled for effective grout scrubbing
- Mop: For cleaning and rinsing the tiles
Always perform a spot test with your chosen cleaner, especially if it contains corrosive chemicals like potassium hydroxide or bleach, to avoid damage to delicate surfaces. Safety is paramount, so equip yourself with the right gear and knowledge before starting.
The Baking Soda Method for Cleaning Grout
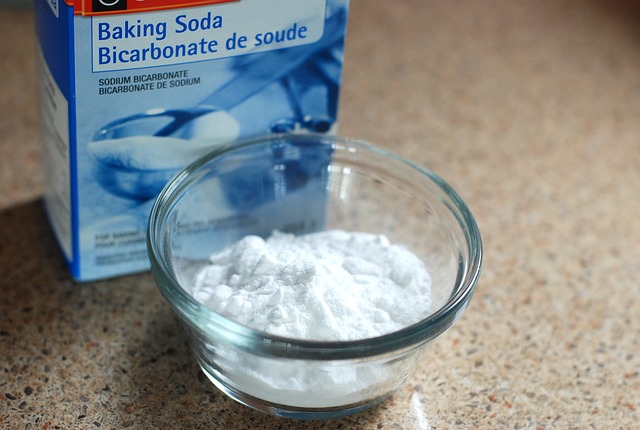
Creating the Baking Soda Paste
To create an effective grout cleaner, mix baking soda with water until it reaches a paste-like consistency. Apply the paste directly to the grout lines using a soft bristle brush for gentle scrubbing.
Ensure the paste is thick enough to cling to the grout without running.
Follow these simple steps:
- Combine 1/2 cup of baking soda with water.
- Stir until fully mixed and paste forms.
- Adjust consistency by adding more baking soda or water as needed.
After application, allow the paste to sit for a few minutes to break down dirt and grime before proceeding to scrub. Once done, rinse thoroughly with water and dry the area with a microfiber towel to prevent residue.
Scrubbing Techniques for Effective Grout Cleaning
Once your baking soda paste is ready, it’s time to get down to the nitty-gritty of grout cleaning. Apply the paste generously along the grout lines and let it sit for a few minutes to penetrate and loosen the dirt.
- Start with a stiff-bristled brush to scrub the grout lines in a circular motion. This helps to lift and remove the grime effectively.
- For tougher stains, allow the paste to sit longer and use more elbow grease, ensuring you reach deep into the grout.
- After scrubbing, use a damp microfiber cloth to wipe away the residue, revealing cleaner grout beneath.
Consistency is key. Regular scrubbing with the right technique can maintain the integrity of your grout without the need for harsh chemicals.
It’s essential to avoid caustic or acidic cleaners that can damage your tiles and grout over time. Instead, focus on gentle, yet effective scrubbing to achieve a sparkling finish. Remember to rinse thoroughly with water and dry the area to prevent any leftover cleaning solution from attracting more dirt.
Rinsing and Drying for a Sparkling Finish
After scrubbing the grout with your homemade baking soda paste, it’s crucial to rinse the area thoroughly. This step ensures that no residue of the cleaning paste remains, which could attract more dirt over time.
Once rinsed, the next step is to dry the tiles and grout lines. A clean, dry cloth or towel works best to absorb any excess moisture. This not only prevents water spots but also allows you to see the sparkling results of your efforts.
The key to a lasting shine is to make sure the area is completely dry before walking on the surface or replacing any items.
If you’re looking for added protection, consider applying a sealer to the grout. This optional step can help safeguard against future stains and prolong the cleanliness of your grout.
Daily and Deep Cleaning Techniques for Kitchen Tiles

Routine Cleaning with Mild Detergent
For daily upkeep of your kitchen tiles, a simple solution of dish soap and water is often sufficient. Mix a few drops of mild detergent with warm water in a bucket, ensuring it’s well-diluted to avoid leaving any residue. Use a soft mop or cloth to gently clean the surface, paying extra attention to the grout lines where dirt tends to accumulate.
After mopping, it’s crucial to rinse the floor with clean water to remove any soap that might dull the tile’s shine. A microfiber cloth can be effective for wiping away excess moisture and ensuring a streak-free finish. For areas with more stubborn grime, a scrub brush may be necessary to dislodge the dirt.
Consistency in your cleaning routine will prevent the buildup of stains and keep your tiles looking their best.
Remember to change the water if it becomes too dirty during the cleaning process, as this can lead to a cloudy film on the tiles. Here’s a quick guide to the steps:
- Dilute mild detergent in warm water
- Mop the tiles and grout gently
- Rinse with clean water
- Dry with a microfiber cloth
- Use a scrub brush for tough spots
Using the Right Mop for Ceramic Tiles
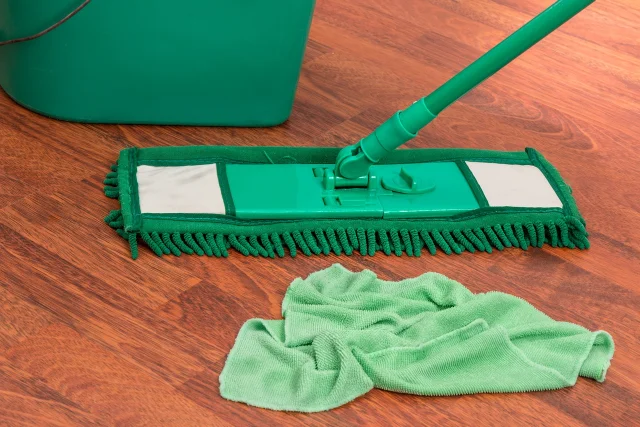
Ceramic tiles are a popular choice for kitchen floors due to their durability and ease of cleaning. Choosing the right mop is crucial for keeping these tiles looking their best. A rag or chamois-type mop is recommended over a sponge mop, as it’s less likely to push dirty water into grout lines.
For a thorough clean, mix warm water with a mild detergent or liquid dish soap. After mopping, avoid water spots by drying the floor with a clean, lint-free cloth immediately. This step ensures a sparkling finish without unsightly marks.
Deep cleaning doesn’t always require harsh chemicals. Even with durable tiles like ceramic, consider gentler options that effectively remove dirt without damaging the surface.
When tackling stubborn buildup, additional tools like the Mr. Clean Magic Eraser can enhance your cleaning efforts. Remember, the key to a pristine kitchen floor lies not just in the cleaning solution, but also in the tools and techniques you use.
Addressing Water Spots and Stubborn Buildup
Water spots and stubborn buildup can be a challenge, but with the right approach, your kitchen tiles can look as good as new. Start by identifying the type of buildup; is it soap scum, hard water deposits, or something else? For soap scum and light stains, eco-friendly solutions with plant-derived ingredients may suffice. However, for more persistent problems, stronger agents like sulfamic acid crystals or professional grout haze removers might be necessary.
- For light stains:
- Use eco-friendly cleaners
- Apply with a concentrated stream
- For heavy-duty messes:
- Consider sulfamic acid or professional removers
- Follow product instructions carefully
When tackling heavy buildup, always test the cleaning solution on a small, inconspicuous area first to ensure it doesn’t damage the tile or grout.
Remember, some cleaners may leave a haze or discoloration if not used correctly. If you encounter such issues, look for specialized products designed to remove these specific types of stains. Patience and the right technique are key to restoring your kitchen floor’s beauty.
Alternative Grout Cleaning Solutions
Hydrogen Peroxide and Baking Soda Combination
Combining hydrogen peroxide with baking soda creates a potent mixture for grout cleaning. Start by dribbling in a little hydrogen peroxide; then stir. Gradually add more, stirring continuously. If too much is added, compensate by mixing in more baking soda.
This combination effectively breaks down grime and whitens grout, making it a popular choice for those avoiding harsh chemicals.
Follow these simple steps for best results:
- Apply hydrogen peroxide directly to the grout lines.
- Scrub the area with a grout brush to work the solution into the grime.
- Sprinkle baking soda over the peroxide and continue to scrub.
- Rinse the area with water, revealing cleaner, refreshed grout.
The Power of Steam Cleaning
Steam cleaning stands out as a potent, chemical-free option for grout care. It effectively blasts away grime, dirt, and discoloration without the need for scrubbing. While steam cleaners can be an investment, their ability to clean without damaging grout makes them a worthwhile consideration.
Steam penetrates deeply into grout lines, ensuring a thorough clean. This method is particularly useful for reaching small, hard-to-clean areas that other methods might miss.
Steam cleaning is safe for various surfaces, making it a versatile tool not just for kitchen tiles but for the entire home.
Here are some benefits of using a steam cleaner:
- No harsh chemicals required
- Minimal physical effort
- Deep cleaning action
- Safe for multiple surfaces
Despite the initial cost, the long-term benefits and effectiveness of steam cleaning can justify the expense for those seeking a comprehensive cleaning solution.
When to Use Commercial Grout Cleaners
Commercial grout cleaners are a robust option for tackling tough stains and heavy buildup that household remedies can’t handle. Choose a commercial cleaner when grease, oil, and soap residue persist despite your best efforts with gentler methods. These products are formulated to deep clean and lift stains, ensuring your grout remains vibrant and true to color.
Before using a commercial cleaner, consider the surface compatibility. Many are not suitable for delicate materials like marble or natural stone. Always check the label for specifics on where the product can be safely applied. For example, some cleaners are designed for white or colored grout lines but should not be used on surfaces like chrome or Corian.
When opting for potent formulas, especially those containing bleach, safety is paramount. Wear protective masks and gloves to shield yourself from harsh chemicals.
Lastly, after using strong cleaning agents, it’s wise to re-seal your grout. This helps maintain cleanliness and extends the time between deep cleaning sessions. If you’re dealing with persistent issues like hard water and soap scum, re-sealing is a step you shouldn’t skip.
Maintaining and Reviving Your Grout

Regular Maintenance to Prevent Staining
Regular maintenance is crucial for keeping kitchen floor tiles and grout in top condition. By addressing spills and stains promptly, you can prevent them from setting in and becoming permanent fixtures on your floor.
Daily sweeping and prompt cleaning of spills are the first line of defense against grout staining. For more persistent stains, targeted stain removal techniques should be employed to maintain the aesthetic appeal of your tiles.
Applying a sealant to grout lines after cleaning can provide an additional layer of protection, making future cleaning tasks easier and more effective.
To ensure the longevity of your tiles and grout, it’s important to use the right cleaning products. Harsh chemicals can damage grout, so opt for milder, eco-friendly options when possible. Here’s a quick checklist for regular maintenance:
- Sweep or vacuum floors daily
- Clean up spills immediately
- Use the appropriate cleaner for your tile material
- Apply a grout sealant periodically
- Schedule deep cleaning sessions as needed
Choosing the Right Cleaner to Avoid Damage
Selecting the appropriate cleaner for your kitchen tiles is crucial to maintain their appearance and integrity. Avoid harsh chemicals like potassium hydroxide or bleach, which can be corrosive, especially on delicate surfaces. Instead, opt for gentler, eco-friendly options that are less likely to cause harm.
Conduct a spot test before applying any new cleaning solution to a large area. This simple step can prevent potential damage and ensure the cleaner is suitable for your tile and grout.
When considering cleaning solutions, it’s important to understand their strengths and limitations. Here’s a quick guide:
- Chemical Cleaners: Effective at disinfecting and breaking down grime, but can be too abrasive for frequent use.
- Eco-Friendly Cleaners: Safer for regular use and less likely to damage surfaces.
- Bleach-Based Cleaners: Powerful cleaning ability, but should be used sparingly to avoid degrading grout over time.
Regrouting: When Cleaning Isn’t Enough
Sometimes, despite your best efforts, grout cleaning methods fall short. When grout is beyond repair, regrouting becomes necessary. This process involves removing the old grout and applying new grout, giving your tiles a fresh and revitalized look.
Before starting, ensure you have the right tools: a grout saw for removal, and a grout float to apply the new grout. Follow these steps for a successful regrouting project:
- Remove the old grout with care to avoid damaging tiles.
- Clean the spaces between tiles thoroughly.
- Mix the new grout according to manufacturer instructions.
- Apply the new grout, pressing firmly into the gaps.
- Wipe away excess grout and shape the lines.
- Allow the grout to cure before sealing, if desired.
While regrouting can be a DIY project, consider professional help for large areas or intricate tile patterns.
Choosing the right grout color can transform the appearance of your kitchen floor. A color that complements your tiles can make them stand out, while a contrasting color can add a unique design element.
Conclusion
Maintaining clean grout on kitchen floor tiles not only enhances the overall appearance of your kitchen but also extends the life of your floors. Whether you opt for natural solutions like baking soda and vinegar or commercial cleaners, the key is regular maintenance and choosing the right method for your type of tile. Remember to always test a small area first and use soft brushes to avoid scratching your tiles. With the tips and techniques outlined in this article, you’re now equipped to tackle grout cleaning with confidence and keep your kitchen floors sparkling clean.
Frequently Asked Questions
What is the best way to clean grimy tile grout on kitchen floors?
To clean grimy tile grout, create a paste by slowly adding water to baking soda. Scrub the grout lines with the paste using a soft bristle brush, then rinse and dry with a microfiber towel.
How should I clean ceramic kitchen floor tiles?
Clean ceramic kitchen tiles with a mix of warm water and mild detergent or liquid dish soap. Use a rag or chamois-type mop for cleaning and dry the floor immediately after washing to prevent water spots.
Can I use a Mr. Clean Magic Eraser for stubborn spots on tile floors?
Yes, for particularly stubborn spots on tile floors, a Mr. Clean Magic Eraser can enhance the cleaning power.
What should I keep in mind when deep cleaning tile floors?
When deep cleaning tile floors, it’s crucial to choose the right cleaner to avoid causing damage and to reduce unnecessary scrubbing. Proper maintenance such as sweeping and cleaning spills promptly is also important.
Are hydrogen peroxide and baking soda effective for cleaning grout?
Yes, hydrogen peroxide and baking soda can be effective for cleaning grout. Apply hydrogen peroxide to the grout lines, scrub with a grout brush, then add baking soda and scrub again before rinsing with water.
When should I consider regrouting instead of just cleaning the grout?
Consider regrouting when the grout is excessively stained, damaged, or when cleaning is no longer effective in restoring its appearance. Regrouting can revitalize the look of your tiled areas.